In our Previous blog, We have seen how we can Setup WHM and cPanel Account on RHEL/CentOs Server. As a continuity to previous blog, here in this Article we will See some basic WHM tweaks and hosting a sample WordPress website using a test domain.
Prerequisite
Fully Functional cPanel Account.
Your Web Domain (We will be using test domain for demo)
Your Website Files and Database Dump (If applicable)
Let’s get started.
Step 1: Add Domain and Edit NS Record.
If you have Create a cPanel with any domain, that Domain will be visible in DNS Zones. In this We have already created a cPanel with our test domain devopsage.tk which we have taken from freenom.com for free. You can also get your free domain from freenom.com but only the condition is that you will only get .tk as top level domain.
Login to WHM Account, Search for edit dns zone from the left Nevigation Pane and Click on It. Select your Domain and Click Edit.
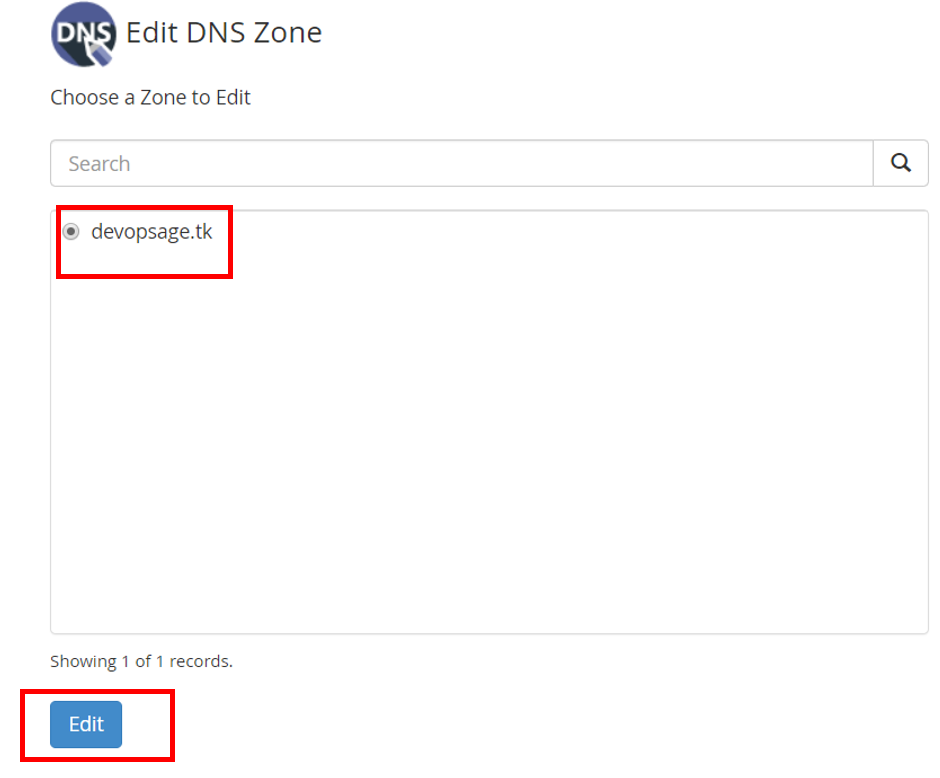
Once You Click on Edit, You will see the entire DNS Configurations file Over there with Various DNS Record Sets. Make Changes to the NS Record Value to make your own Custom NS Record.
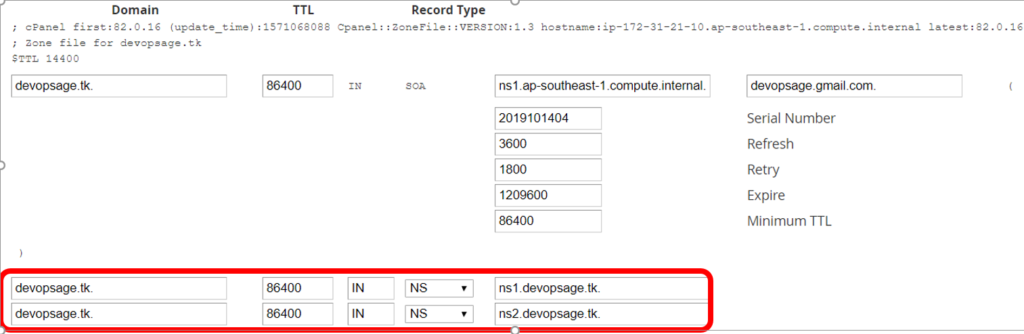
So the Value Will be Like,
devopsage.tk NS ns1.devopsage.tk.
devopsage.tk NS ns2.devopsage.tk.
Now Scroll Down and Add a new Entry as shown in the Screenshot Below,

Note: make Sure to change the Domain and Public IP With your Domain and IP. Its better if you can get a Static Public Ip for this.
Now you have to Update the NS Record at you Domain Provider, Like Godaddy, Inmotion hosting etc. For Our case Its freenom.com
Login to your Domain Provider, Select your Domain and Click On manager DNS. Now We have to Edit the HostName settings in Godaddy (Glue record in case of freenom.com) as Shown in the Screenshot below.
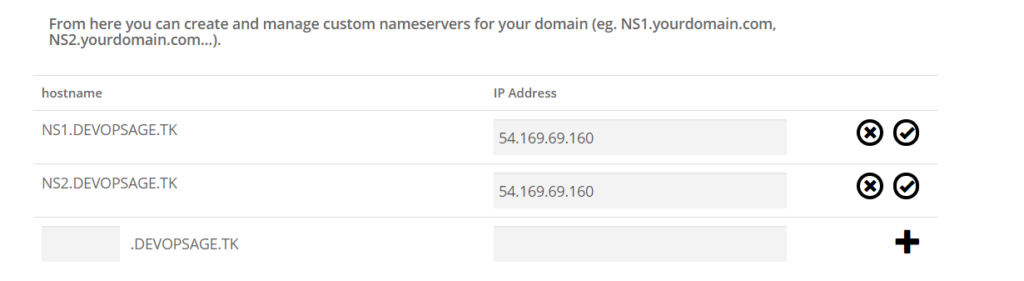
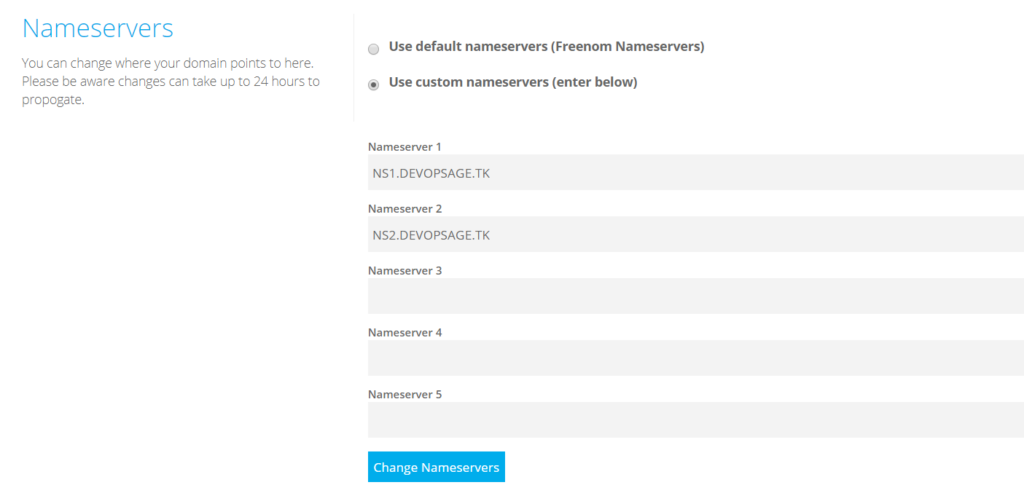
Now, Its time to Update the Custom Name Server Record Set. Below screenshot is for freenom.com. UI differs in case of other Hosting providers.
Step 2: Install the required packages and perform basic Configuration
Once Updated DNS Zone File, Then Click on Save to Save the Changes.
Hosting a PHP/Wordpress Websites May need multiple packages Which need to be be Installed. So in order to Install the PHP Packages, Search for EasyApache 4 Under Software Section in the Nevigation Pane at the Left.
WHM –> Software –> Apache –> currently installed packages –> view packages –> install required packages.
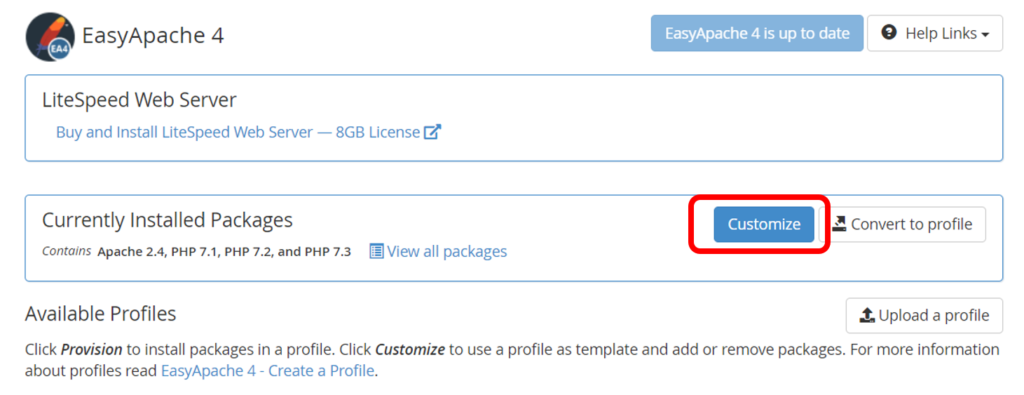
Click On Customize and Select Whatever PHP Version, PHP Extensions and Additional packages you need to Install based on your application requirement.
Now Search for tweak Settings from the WHM Search Section, here you can see all the basic settings like, domain, mail, php, logging etc. make changes to it as per your requirement.
Note: If you need to Restart any Services like, Apache, php-fpm or mail server then Search for Restart Servies, Select the Service need to be restarted and Click on Restart.
Now Once all basics Configuration is done, then move ahead to the cPanel Account.
Step 3: Login to the cPanel Account
Click On List Account -> Click on cPanel Account which Will redirect you to the cPanel Account.
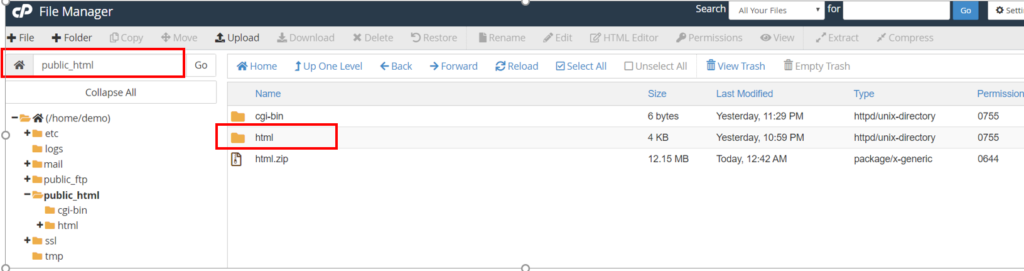
Once logged in to the cPanel, Click on File Manager ==> Click Public_html.
Note: All your Public Website Data Will reside Under Public_html itself. Upload your website data here. For our case name is html.
Step 4: Create a Database and Database User
Now, Considering We have a database for our website, We need to Create a database and a User and will have to import the database dump here.
In cPanel ==> Search for Mysql Databses. Create a database say “demo_wordpress”.
Scroll Down ==> Add a user say “demo_user”. Set Secure password for it and Click Create.
Eventually, Add a user to database. Select user for their Corresponding database and Click Add. Select All privileges and Click make Changes.
So we have a user demo_user who has all privileges on demo_wordpress database. make Sure to update the credentials in your Application.
wp-config.php => for wordpress , or any Custom location like .env for database credentials.
Step 5: Redirect primary domain to Subdirectory.
Now, Search for Domain and Click on it.
So here, what we can see is request coming to devopsage.tk will be send to the /public_html. In this case we have to keep all our application data in public_html, but it will be messy. For our case we have created a folder under public_html with a name html and copied all website related date on it. Directory structure looks like /public_html/html/
In Short we have to redirect the the request coming to /public_html to /public_html/html. It’s the best way to organise if you have multiple applications or websites to host.
Go to File Manager ==> Settings (at top right corner) ==> Show Hidden files.
In /Public_html Create a hidden file called .htaccess and paste the below redirect rule.
RewriteEngine on
RewriteCond %{HTTP_HOST} ^(www.)?devopsage.tk$
RewriteCond %{REQUEST_URI} !^/html/
RewriteCond %{REQUEST_FILENAME} !-f
RewriteCond %{REQUEST_FILENAME} !-d
RewriteRule ^(.*)$ /html/$1
RewriteCond %{HTTP_HOST} ^(www.)?devopsage.tk$
RewriteRule ^(/)?$ html/index.html [L]
Step 6: Upload Your Database Dump.
Search for PHPMyadmin on cPanel Console and Click on it. You will see the Database there which you have created.
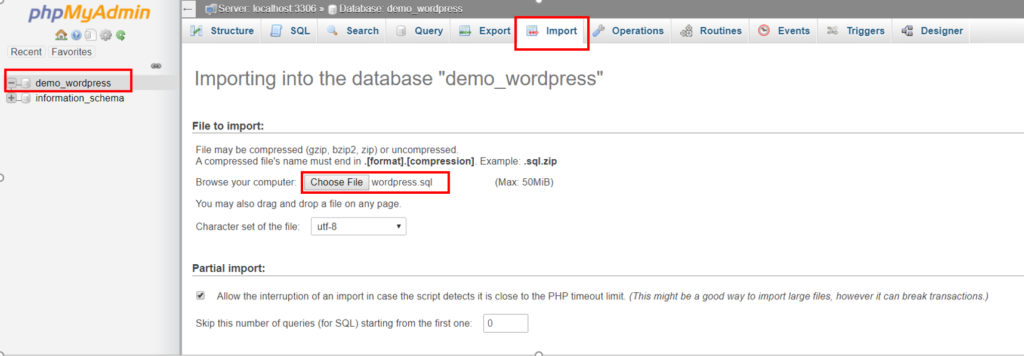
Upload the SQL Dump there. Now You are all set to Access your Website Which you have hosted on cPanel. Before accessing check whether the DNS is resolving to your public IP or Not.
# dig a +short devopsage.tk

Okay, So as we can see that DNS Resolution is done. Go ahead and hit the Domain on URl in order to Access the Website.
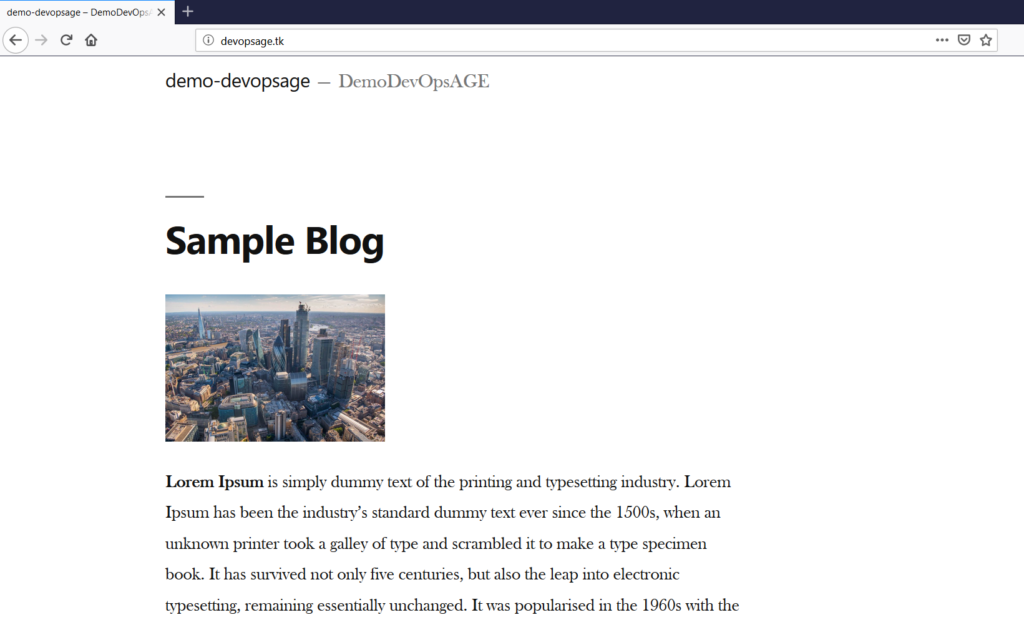
So we have Successfully Hosted our Website on cPanel. Let’s try and Post your feedback in the comment Section.
If you Like Our Content here at Devopsage, then please support us by sharing this post.
Please Like and follow us at, LinkedIn, Facebook, Twitter, and GitHub
Also, Please comment on the post with your views and let us know if any changes need to be done.
Thanks!
You may Also need to look at below Posts,
How to Install and Setup WHM and cPanel On CentOS7
How to Install WordPress on Top of LAMP Stack on Ubuntu and Redhat/CentOS7 Server.
How to Create Email and FTP Account in cPanel – Part3
How to Redirect Primary Domain to a Specific Folder in cPanel.
Issue – cPanel Email Going to Spam.
Unable to Login cPanel FTP with Failed to Retrieve Directory Listing Error
How to Migrate WordPress Website to cPanel – Part 4
How to Migrate Email Accounts from One cPanel to Another – Part 5
How to use an SSL Certificate for your cPanel Website for Free – Part 6
Redirect HTTP to HTTPS for your Website on cPanel – Part 7
How to Upgrade and Downgrade MariaDB Version in WHM/cPanel – Part 8
cPanel – phpMyAdmin asking for Username and Password. Error – Access Denied.