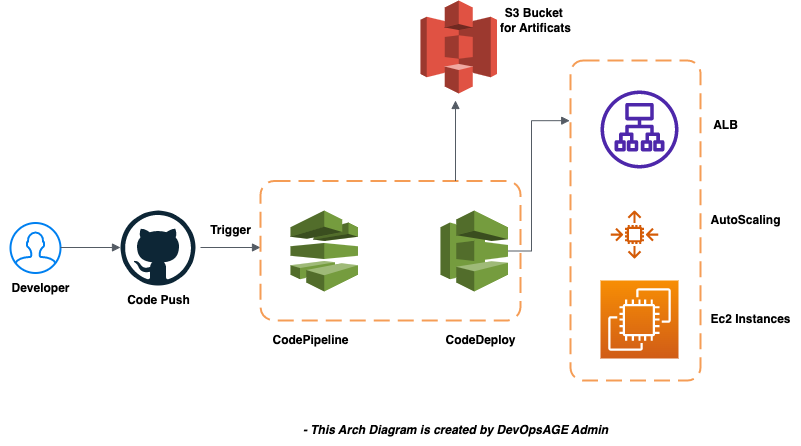
In this article, we will go through the Continuous deployment of the source code on the EC2 instances which are under AutoScaling using the AWS native services, CodeDeploy and CodePipeline.
Generally, it’s not straightforward to deploy the new releases in the servers which are dynamic and can be added or destroyed anytime. CodeDeploy fulfills the purpose here.
An approach that we have used to create the Continuous deployment of the source code can be seen in the below Architecture Diagram.
Prerequisite
- You need to have the AWS Account and basic knowledge of AWS core services.
- GitHub Account, as we have used GitHub for source code.
- Basic Linux Knowledge
Key Takeaways
By the end of this article, you can
- Deploy Sample web on apache server
- You can put you Web App in Autoscaling for high availability
- Your application code will be deployed automatically to the newly added server which is part of autoscaling group
- Any changes to the Source code will automatically trigger the codepipeline which will further trigger codedeploy to deploy your changes to the ec2 instances.
Github Repo Link
Summary
Step 1: Create IAM role for CodeDeploy and EC2 Instance.
Step 2: Create an EC2 Instance
Step 3: Create a Target Group and Application load balancer
Step 4: Create the AMI backup of the Instance launched in Step 1
Step 5: Create a Launch Template and Auto Scaling group
Step 6: Create Code Deploy
Step 7: Create CodePipeline for Continues Deployment
Let’s get started.
Step 1: Create IAM role for CodeDeploy and EC2 Instance.
Search for IAM Service and Select IAM from left nevigation pane
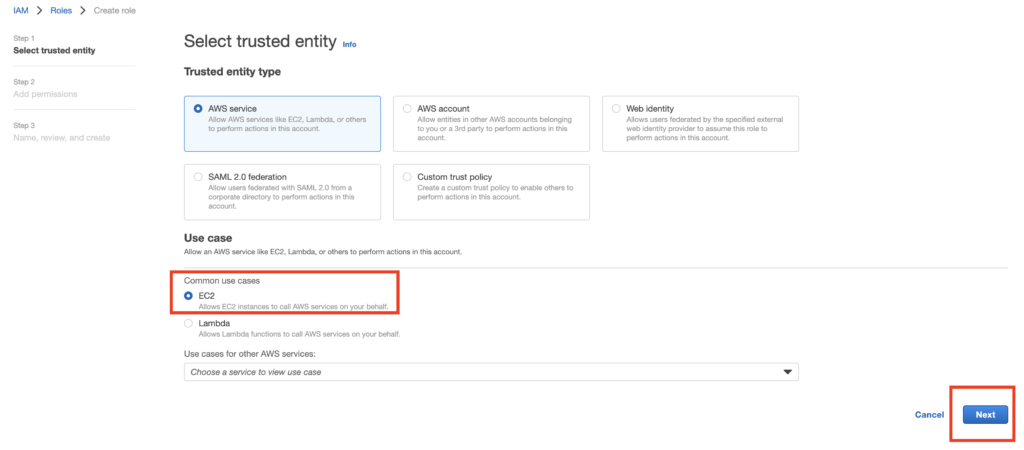
Select Role Policy: AmazonEC2RoleforAWSCodeDeploy
Give Role a name and Click Create.
Similarly Create another role for CodeDeploy Service
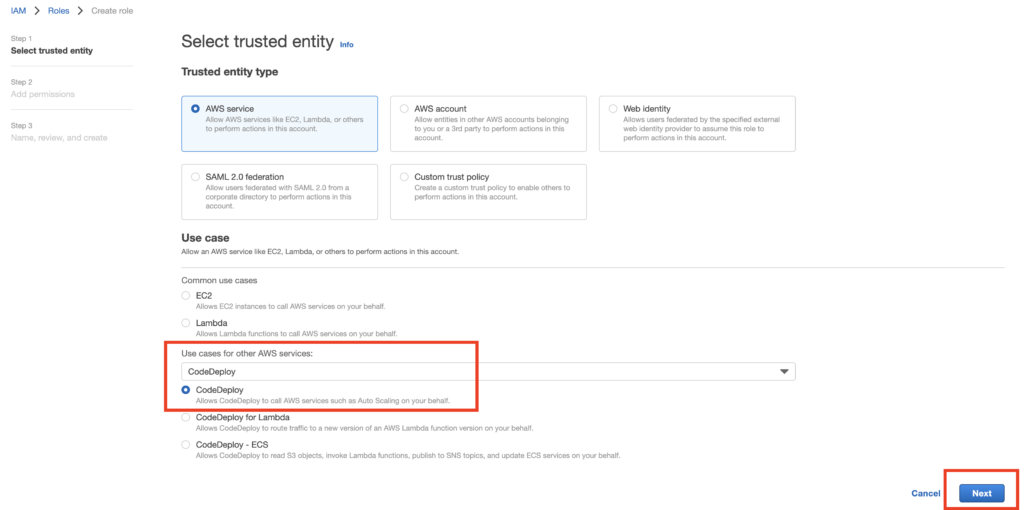
Select Role Policy : AdministratorAccess (Just for testing)
Give Role a name and Click Create.
Step 2: Create an EC2 Instance
Now, lets create an ec2 Instance for the demo purpose.
Name: demo-app
AMI: Amazon Linux
Instance Type: t2.micro
Security group: Select you Security group.
IAM Instance profile: ec2RoleforCodeDeploy
Under Advance tab, Pass in user data as below or copy from Github Repo
#!/bin/bash
# Script to install aws cli and codedeploy agent
# Install aws cli
yum install pip -y
pip install awscli
# Install codedeploy agent
yum update
yum install ruby wget -y
cd /home/ec2-user
wget https://aws-codedeploy-ap-southeast-1.s3.ap-southeast-1.amazonaws.com/latest/install
chmod +x ./install
./install auto
sudo service codedeploy-agent start
sudo service codedeploy-agent status
# install httpd
yum install httpd -y
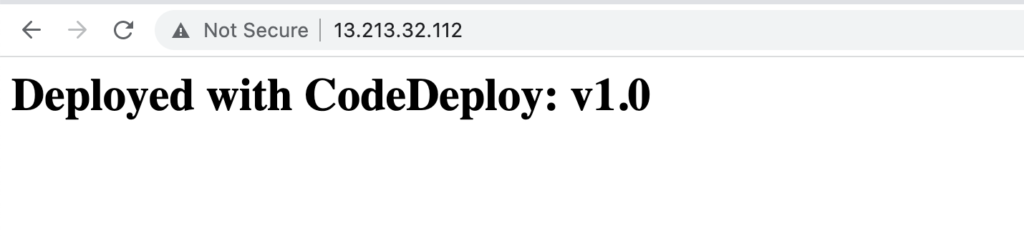
echo "<h1>Deployed with CodeDeploy: v1.0</h1>" > /var/www/html/index.html
service httpd start; chkconfig httpd onCopy the public IP of the Server and paste it into the URL to see the sample page.
http://13.213.32.112/
Step 3: Create a Target Group and Application load balancer
Go to Ec2 -> Target Group -> Create Target Group.
Choose target type: Instances
Give the target group a name and Click Next
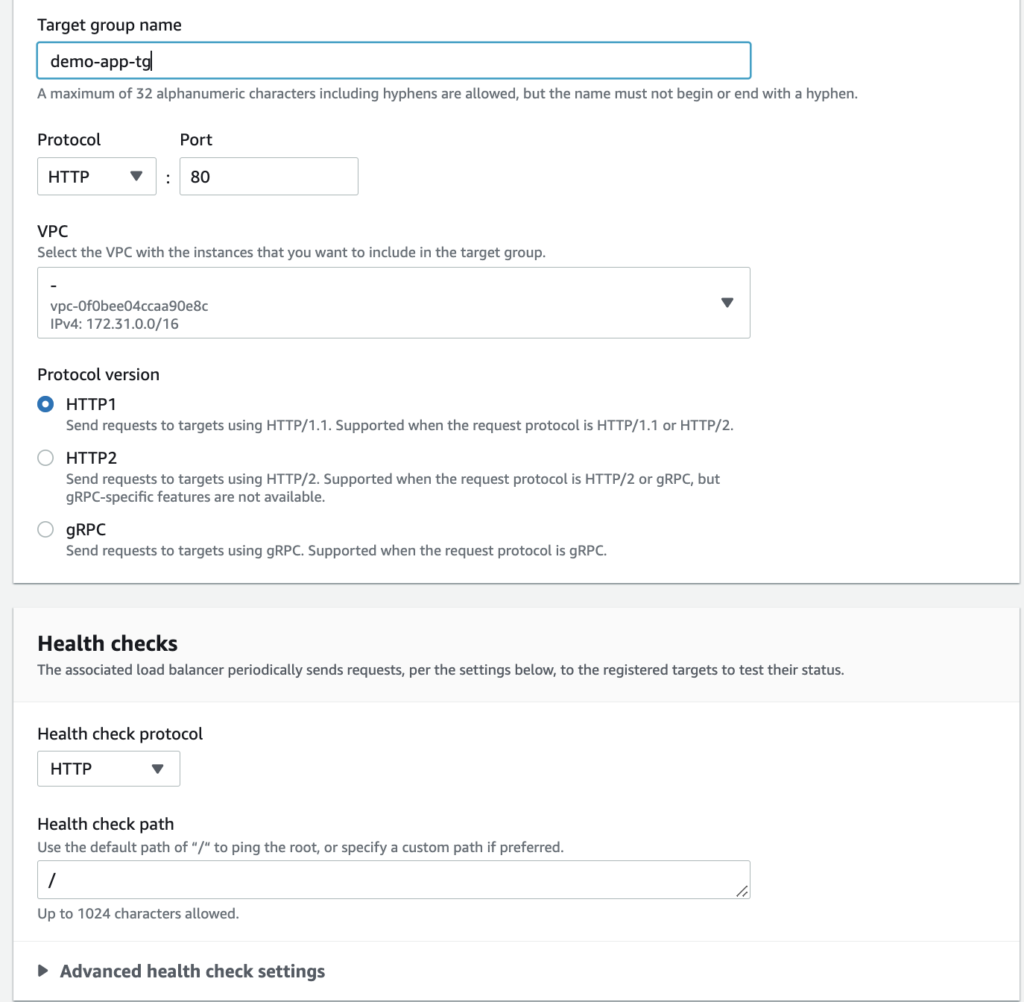
Skip the Register Target and Click Create Target Group. Let the auto-scaling group add the target later.
Now Create the LoadBalancer.
Go to LoadBalancer –> Click Create Load Balancer
Select the Application Load balancer as the Instance type
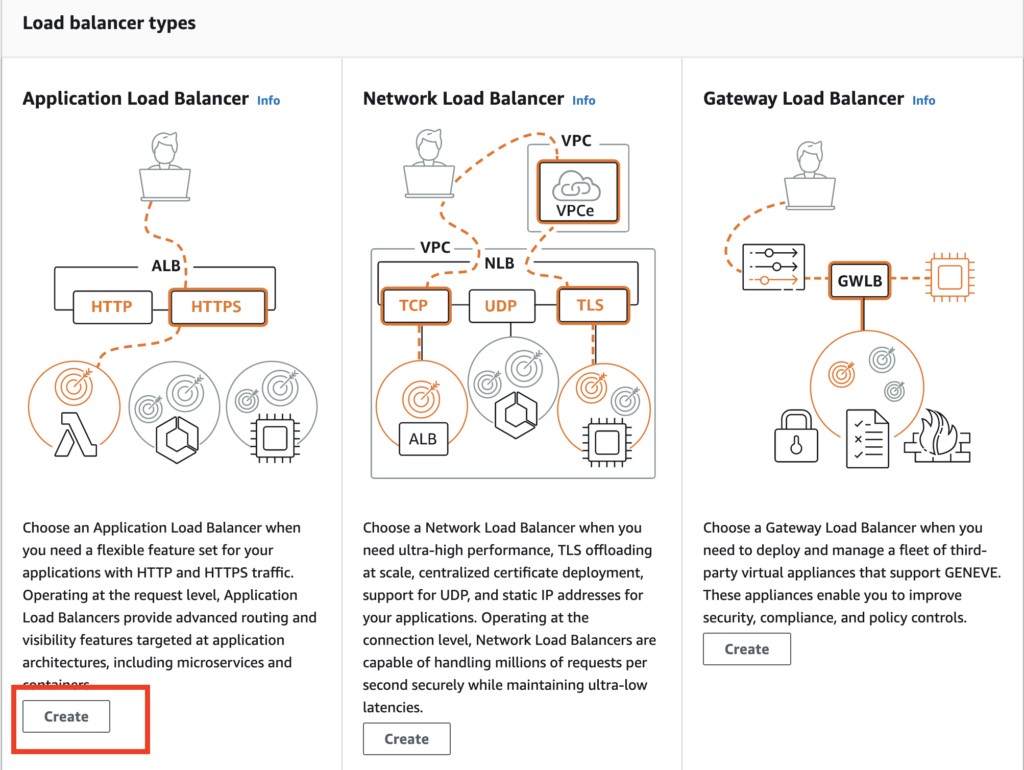
Application Load Balancer
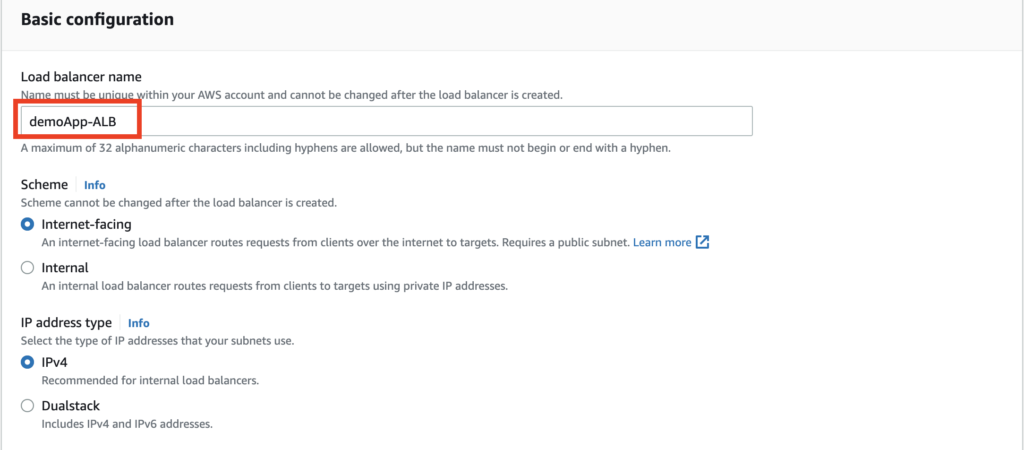
Load Balancer name

Click Create Load Balancer.
Step 4: Create the AMI backup of the Instance launched in Step 1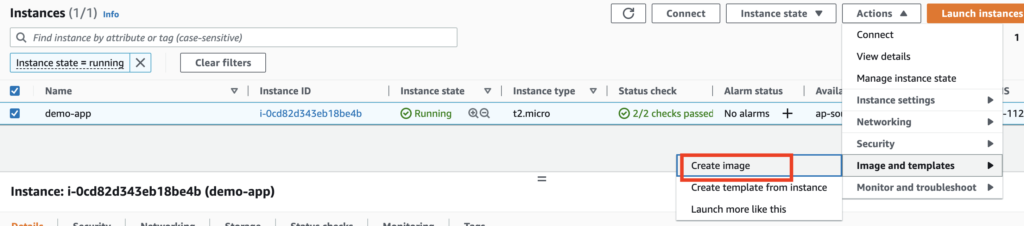
Give AMI a name and Click Create

Step 5: Create a Launch Template and Auto Scaling group
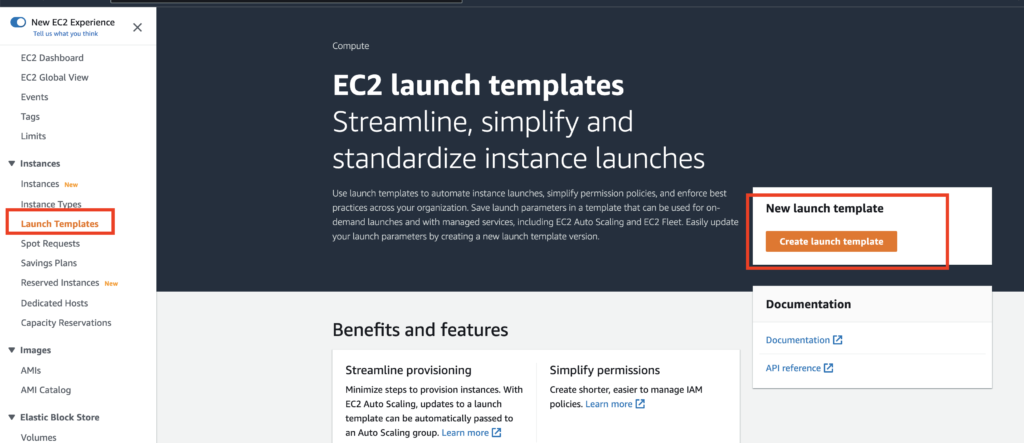
Create Launch template
Provide the following details,
launch template name: demo-app-lt
template version description: demo-app-lt – v1
AMI: Select my AMI and choose the AMI Created above
Instance Type: t2.micro
Security group: Select same security group for demo
Subnets: Select any public subnet as its just for testing
key pair: Select/create key pair.
Give a resource tag and Click Create Launch template.
Now Let’s Create Auto Scaling group.
Nevigate to the Autoscaling group and Click Create AutoScaling group
Provide details,
Autoscaling group name: demo-app-asg
Launch template: Select launch teplate created above.
Select VPC, Az and Subnets
Load Balancer Config,
Select: Attach an existing load balancer and select the target group created above.
Set the desired, minimum and max capacity according to your requirement.
Scaling Policy : target tracking scaling policy
Give Policy a Name
Metric Type: Average CPU Utilization
Target value : 80%
Click Next and Create AutoScaling Group.
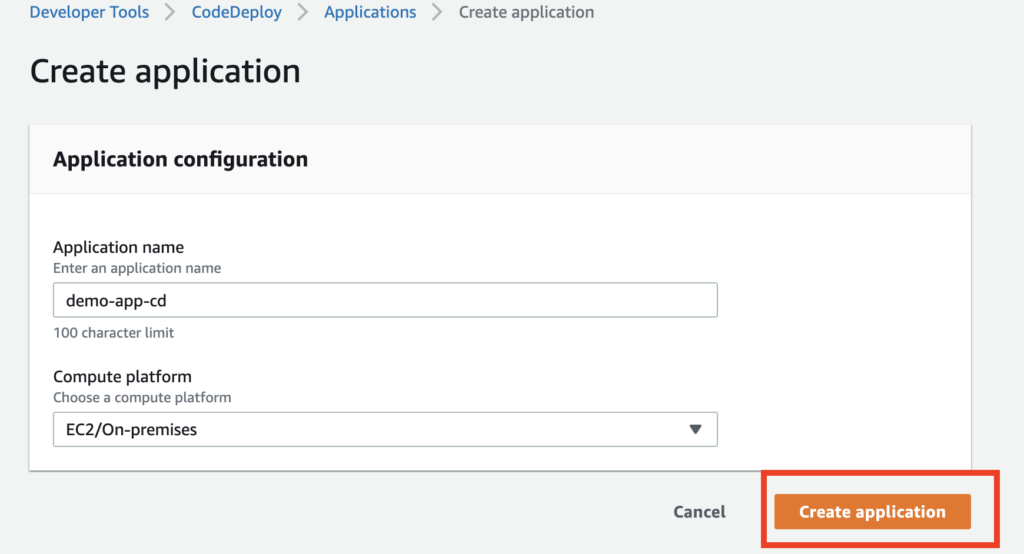
Step 6: Create Code Deploy
Search for Code Deploy in the Service –> Applications
Click Create Application
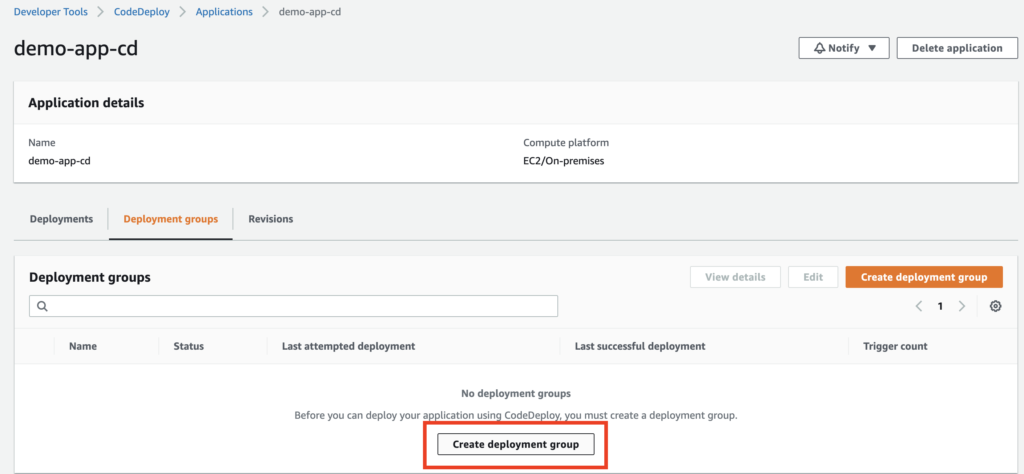
Now, Create a Deployment group. Follow the steps as shown in the screenshot below
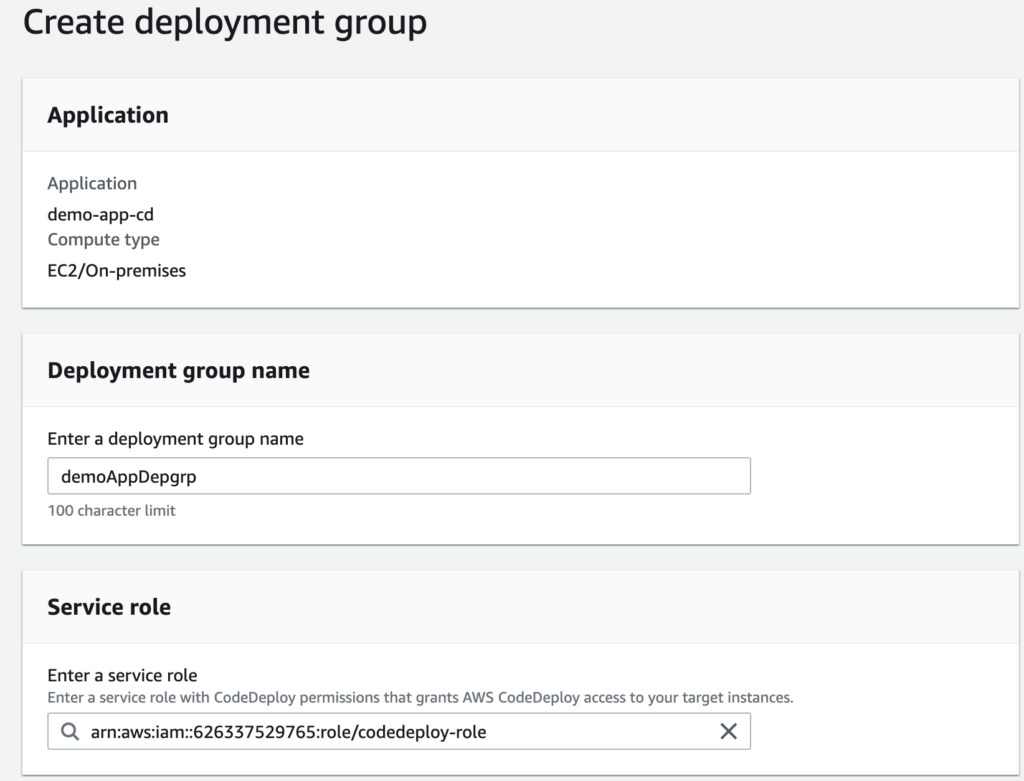
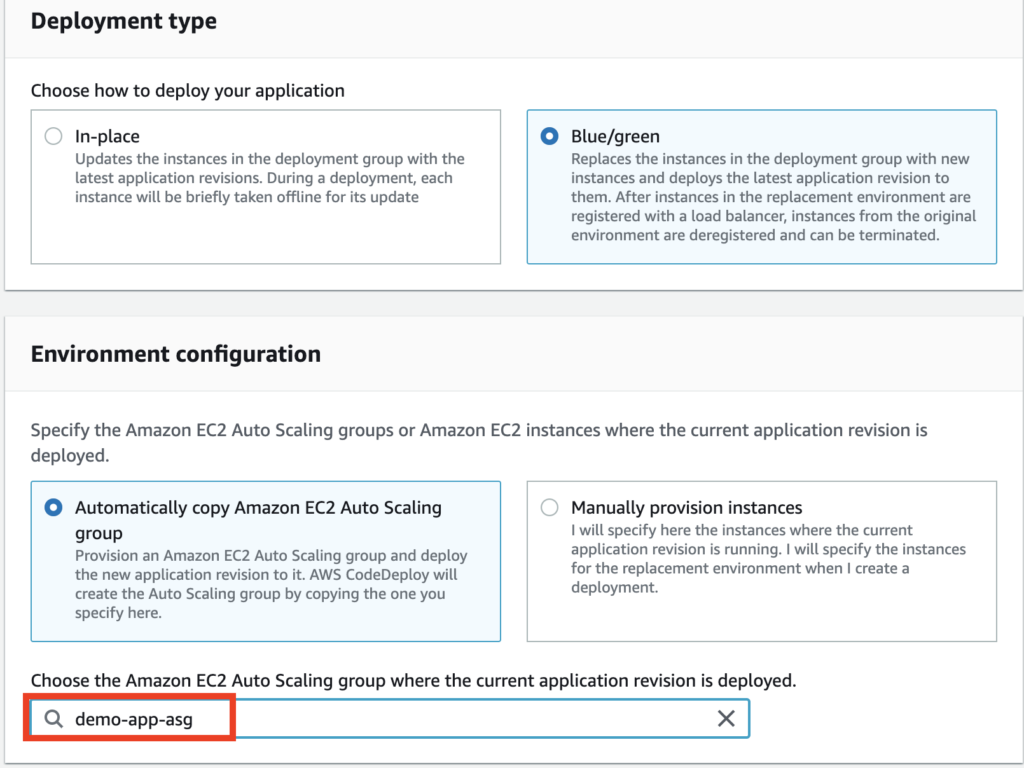
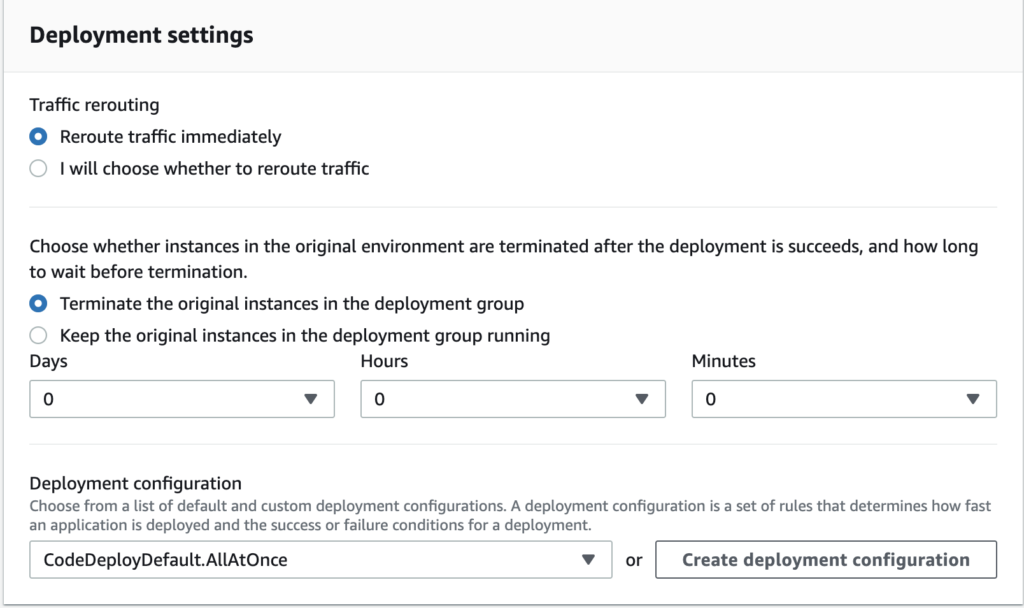
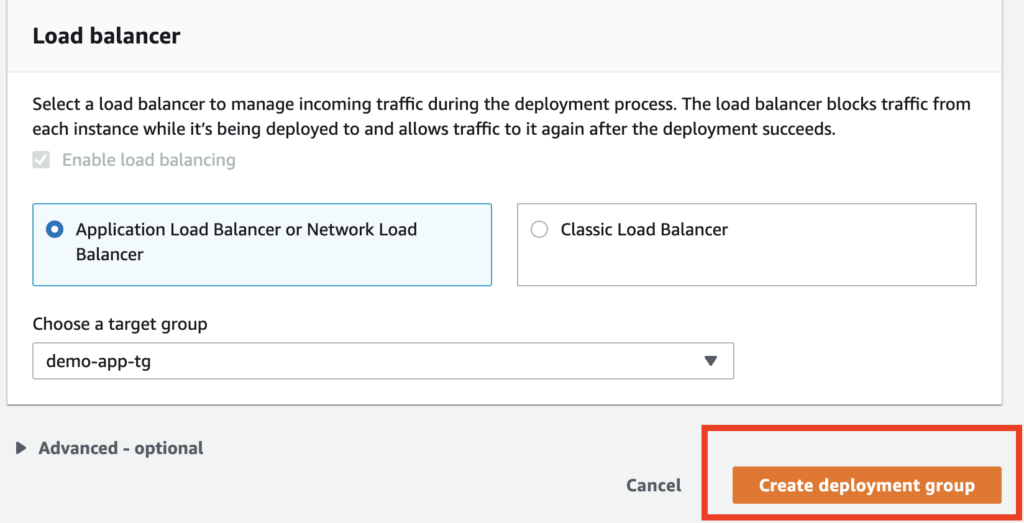
Select all Config Settings as shown in the screenshot above.
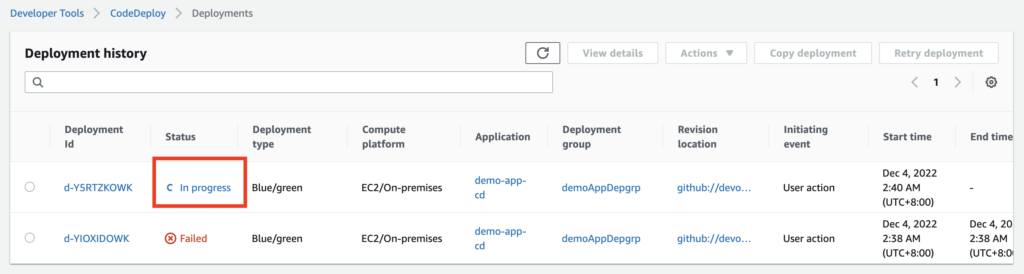
Now it’s time to create the deployment.
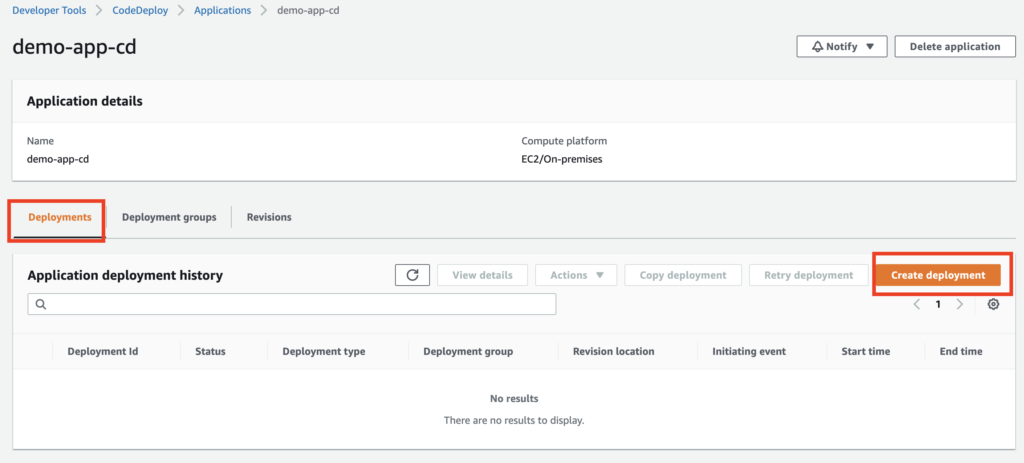
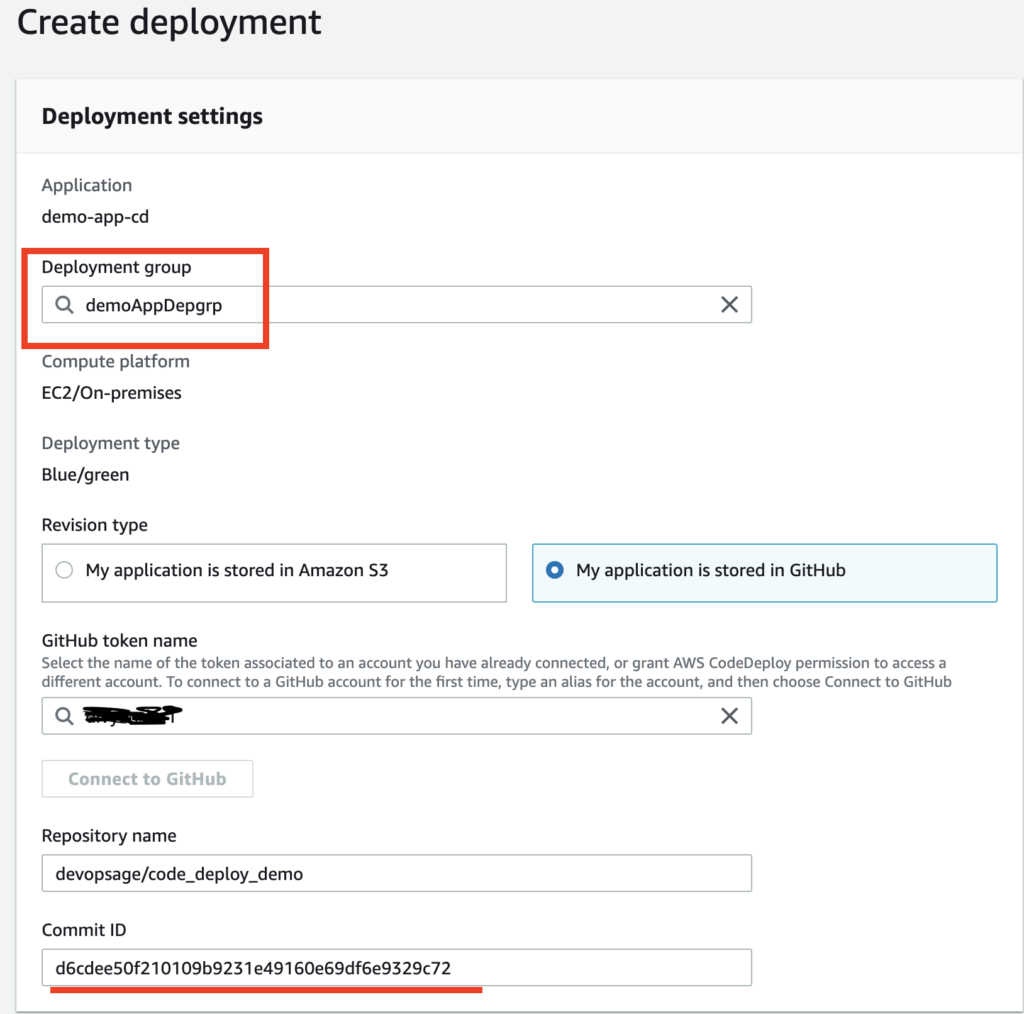
- While creating the deployment, Select the Deployment group created above. Select My Application is stored in Github
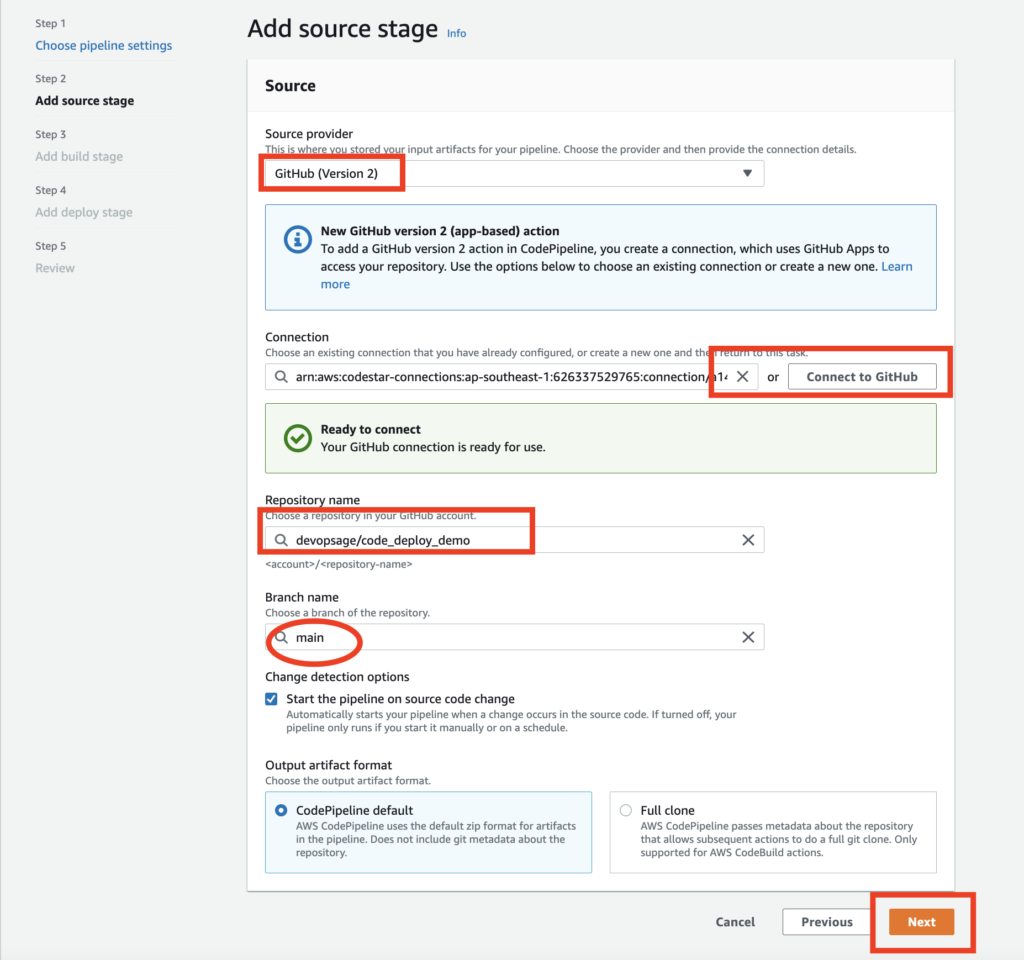
Note: You will need to authenticate to your github account so that you can select you repo.provide the repo name : <github_account_name>/repo_name.
Note:
- Codedeploy will deploy you app as per the instruction you have written in the appspec.yml file.
- appspec.yml file should be kept in the root path of the repo
file name should be either appspec.yml or appspec.yamlappspec.yml file basically says code deploy to execute the code in sequence specified.
Sample appspec.yml file is as below which is used for this example.
version: 0.0
os: linux
files:
  - source: web/index.html
    destination: /var/www/html
hooks:
  BeforeInstall:
    - location: scripts/display.sh
      timeout: 30
      runas: root
  AfterInstall:
    - location: scripts/change_permissions.sh
      timeout: 30
      runas: root
  ApplicationStop:
    - location: scripts/stop_server.sh
      timeout: 30
      runas: root
  ApplicationStart:
    - location: scripts/start_server.sh
      timeout: 40
      runas: root
Check for the entire code used for this example in GitHub Repo.
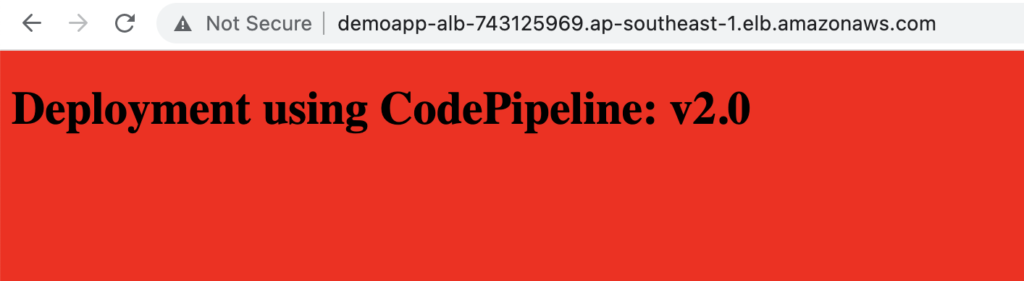
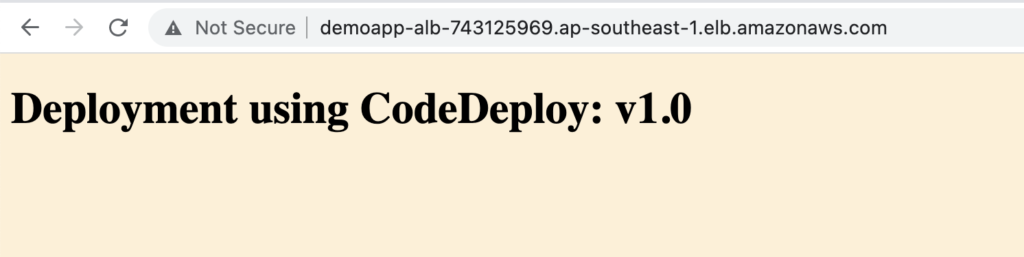
Now Once the deployment is successful, take the DNS endpoint of ALB and paste in the URL.
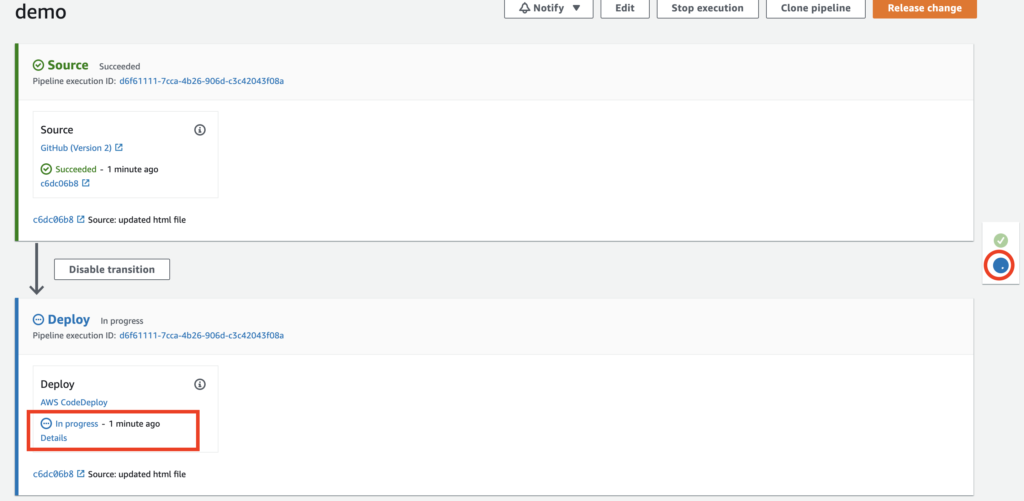
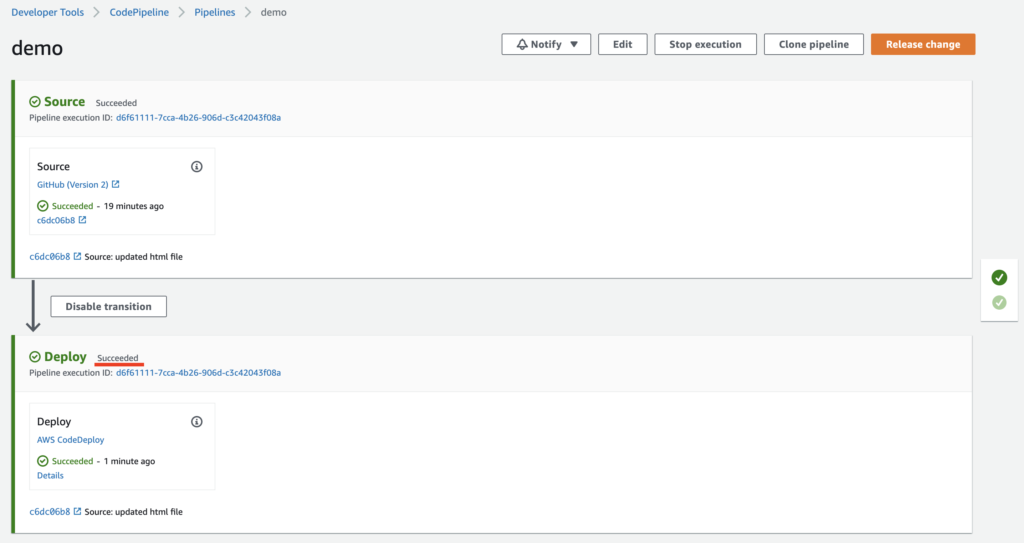
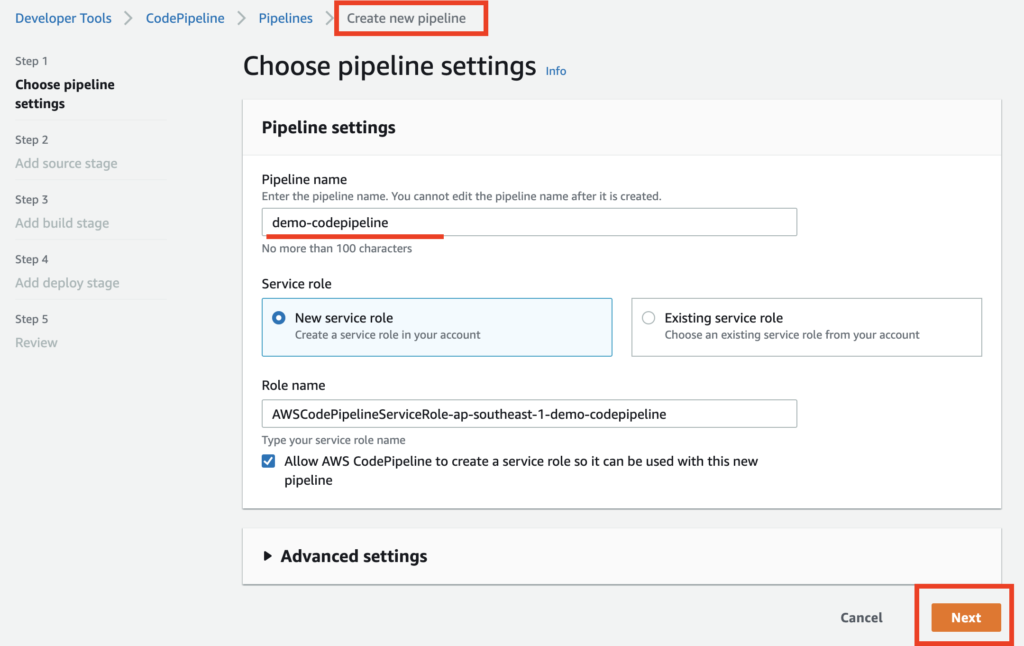
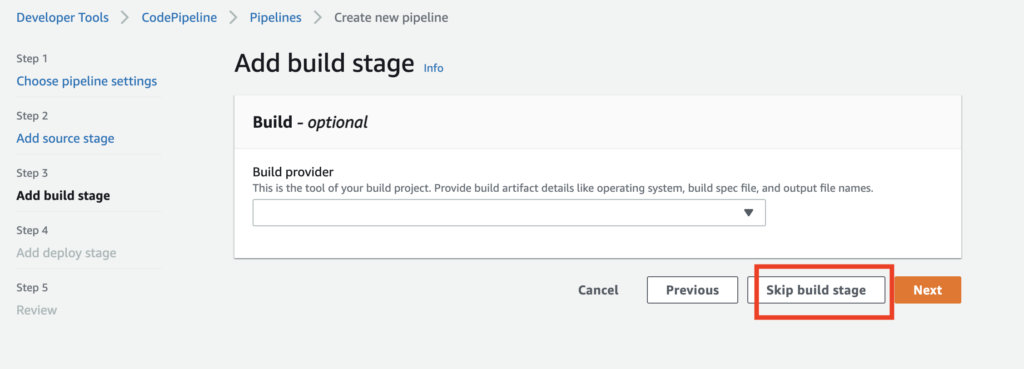
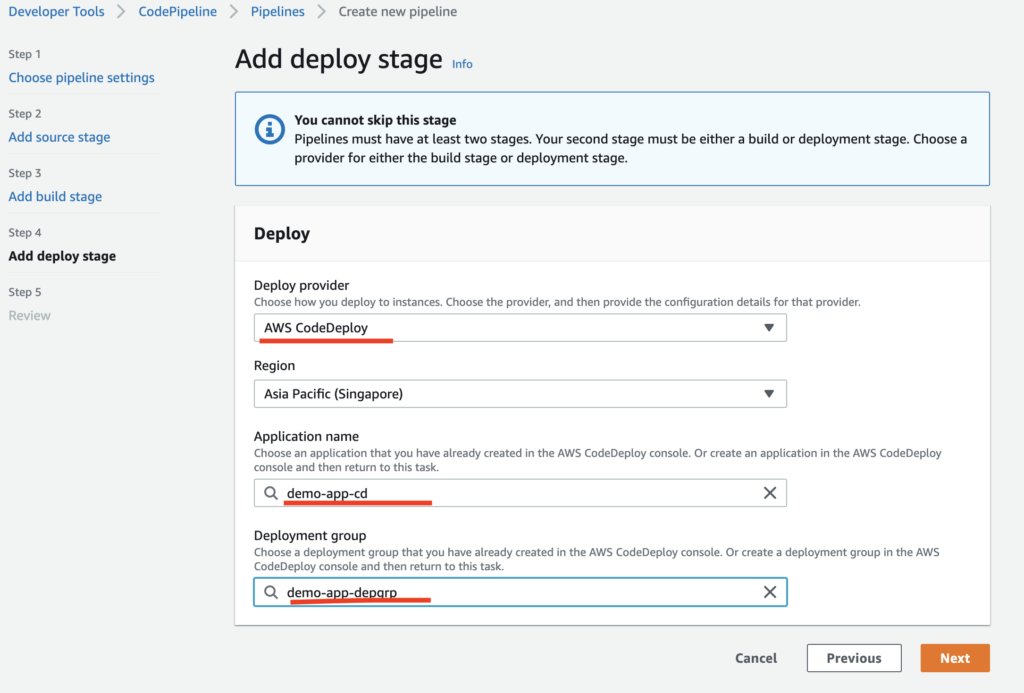
Step 7: Create CodePipeline for Continues Deployment
Create a code pipeline and configure it in such a way that once the new changes to the code are pushed to GitHub, the code pipeline should auto-trigger and deploy the changes.
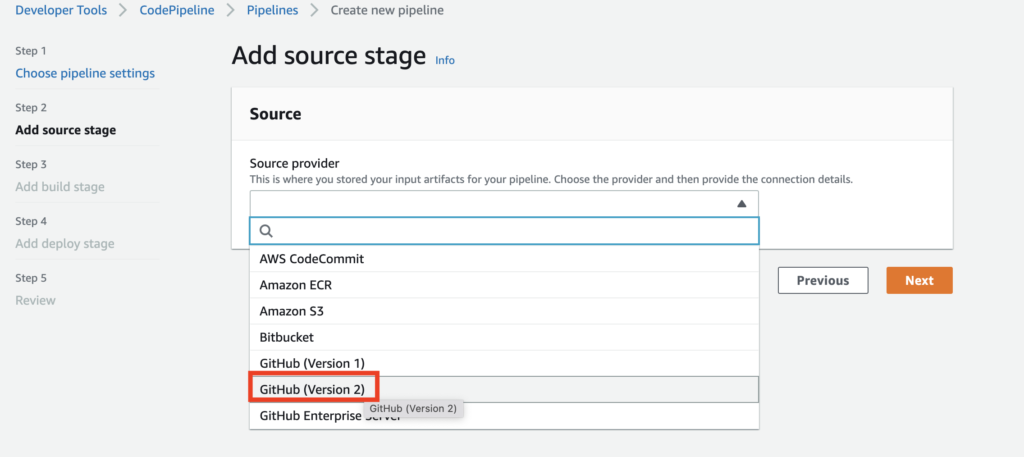
Skip the build provider as we are not using any build platform for building our app.
Select followings,
Deployment Provider: CodeDeploy
App name
Deployment group
Now make changes to your source code and push it to Github. You will observe that the code pipeline is auto-triggered.
Just wait for the code pipeline to deploy your app revision and verify with the ALB endpoint once the deployment is finished.