In last post, you got the basic about why we need to identify the hardcoded application with a DC. In this post, we will see how we can do it. There are mainly three parts:
- Change in local Gropup Policy
- Change in Windows Registry
- Increase the size of Directory Services logs
Always remember:
- Don’t enable these settings in all the domain controllers at a time, else it will create an outage.
- The DC you are enabling these settings should not hold any FSMO role. If there are any FSMO role on that DC, please transfer it to any other DC before executing below steps.
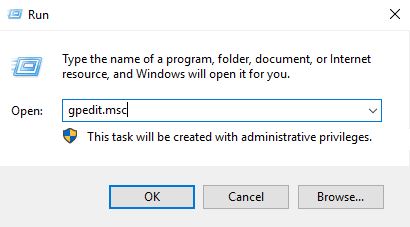
Open Run and execute – gpedit.msc
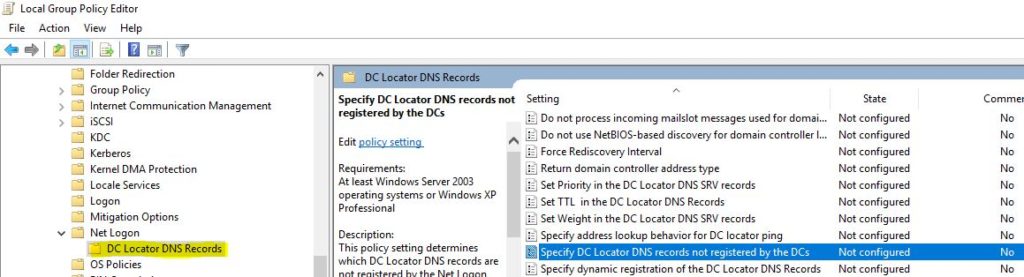
In Group Policy Editor console, go to Computer Settings -> Administrative Templates -> Services -> Net Logon -> DC Locator DNS Records. At right pane, double click on “Specify DC Locator DNS records not registered by the DCs”.
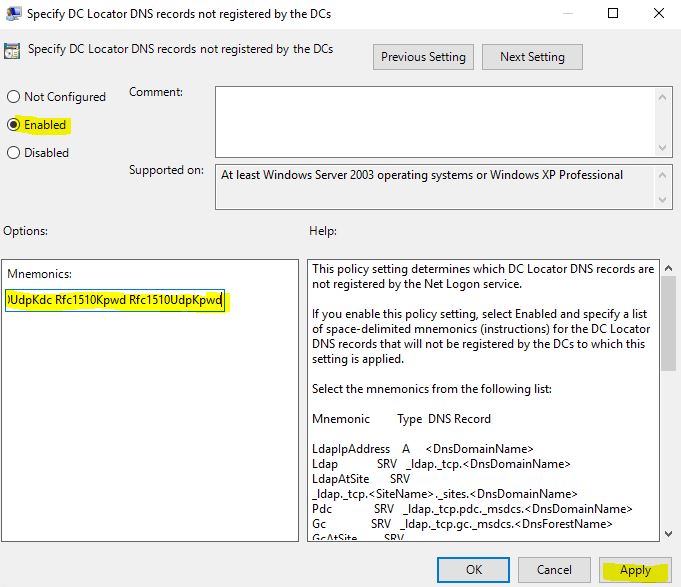
In the settings, select Enable and then paste the following code in Mnemonics field. The code is case sensitive and has to be pasted as it is:
LdapIpAddress Ldap LdapAtSite Pdc Gc GcAtSite GcIpAddress Kdc KdcAtSite Dc DcAtSite Rfc1510Kdc Rfc1510KdcAtSite GenericGc GenericGcAtSite Rfc1510UdpKdc Rfc1510Kpwd Rfc1510UdpKpwd
Note: After this step, please wait for some time for the replication. Ideally it should not take more than 2 hours. However it’s recommended that you should wait for 24 hours.
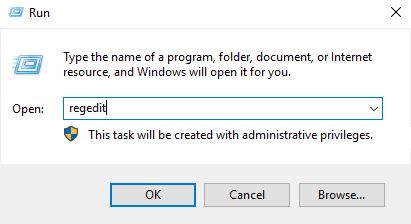
Now open “regedit”
If your Domain Controller version is Windows 2003 or Windows 2008
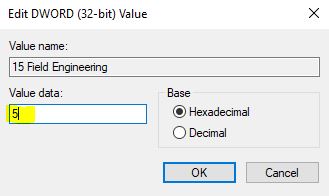
In Registry Editor, go to HKEY_LOCAL_MACHINE -> System -> CurrentControlSet -> Services -> NTDS -> Diagnostics and double click on “15 Field Engineering”.
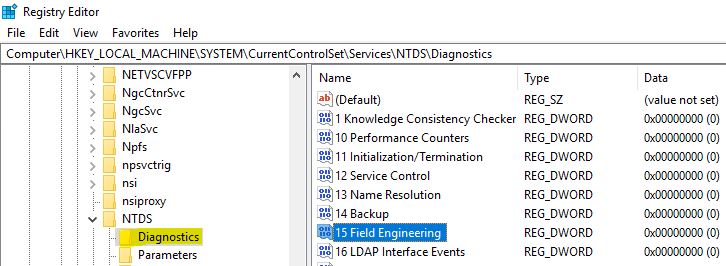
Change the value to 5 and click OK.
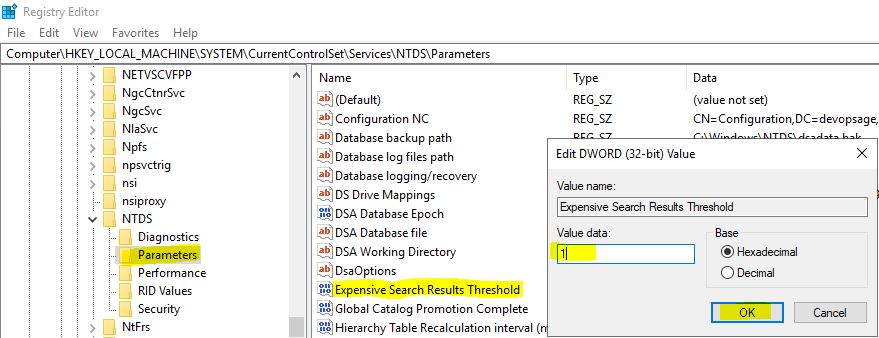
Go to HKEY_LOCAL_MACHINE -> System -> CurrentControlSet -> Services -> NTDS -> Parameters. Right-click on Parameters and create a new DWORD value:
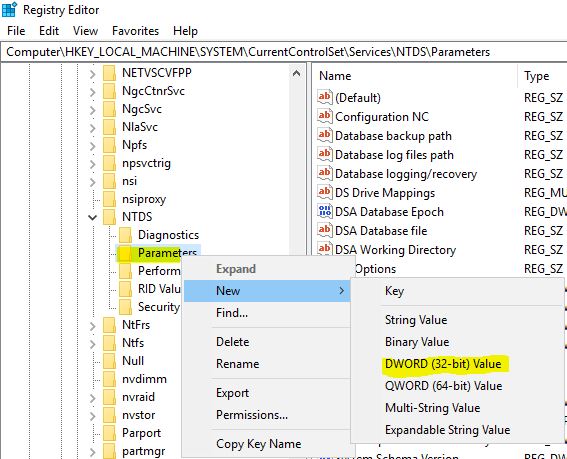
Name the newly created DWORD as “Expensive Search Results Threshold” (case sensitive) and give the value as 1.
If your Domain Controller version is Windows 2012 and above:
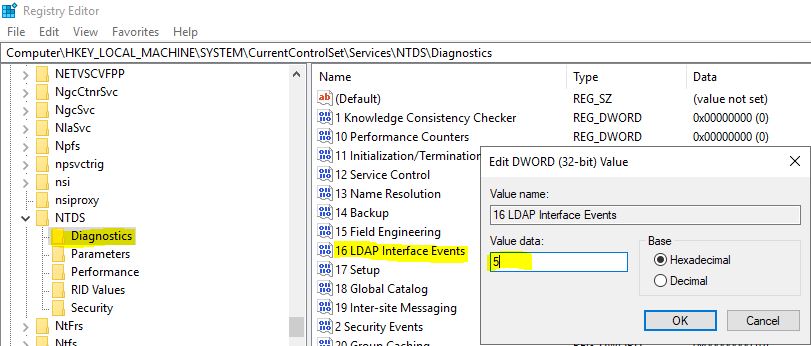
Go to HKEY_LOCAL_MACHINE -> System -> CurrentControlSet -> Services -> NTDS -> Diagnostics. Double click on “16 LDAP Interface Events” and set the value as 5.
You are done now. New events will now keep generating in event viewer:
- For Windows 2003 and Windows 2008 DC: Event ID 1644
- For Windows 2012 and above: Event ID 1138 and 1139
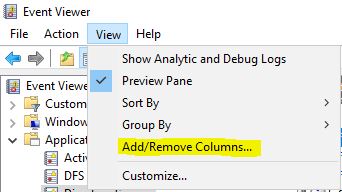
To see that, open “eventvwr.msc”:

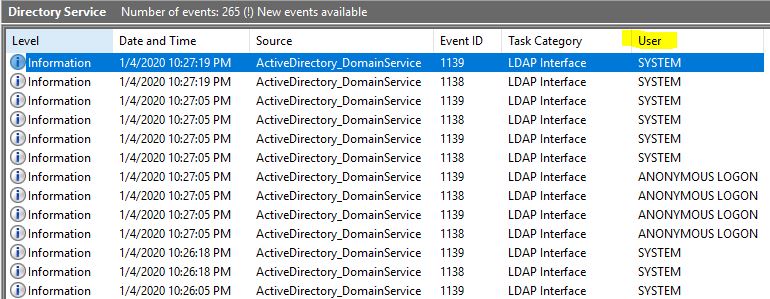
You will see many events getting generated under Event Viewer -> Applications and Services Logs -> Directory Services. (in my case DC version is Windows 2019, hence events 1138/1139 are generating).

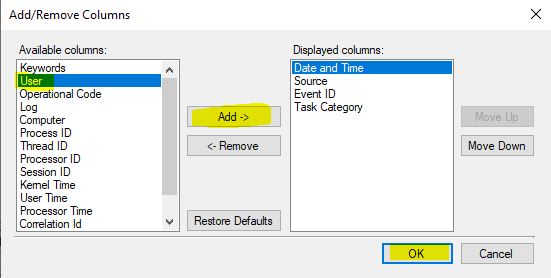
By default, “User” field will not be selected. To see that, click on View -> Add/Remove Columns:
Now select “User” and add it to the right pane:
Once done, you will be able to see the User information too:
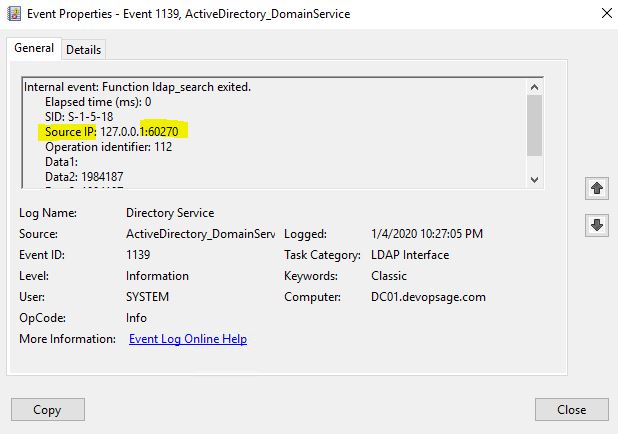
If you double click on the event, you will see the Source IP and Port No, which will help you to identify the server from where the connection is coming. You can go to that server and remove the dependencies.
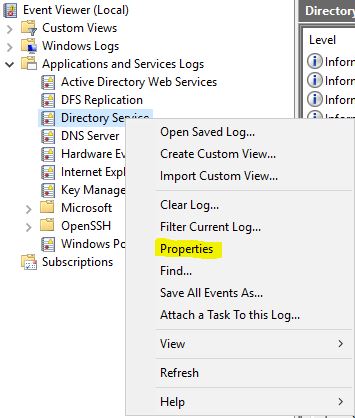
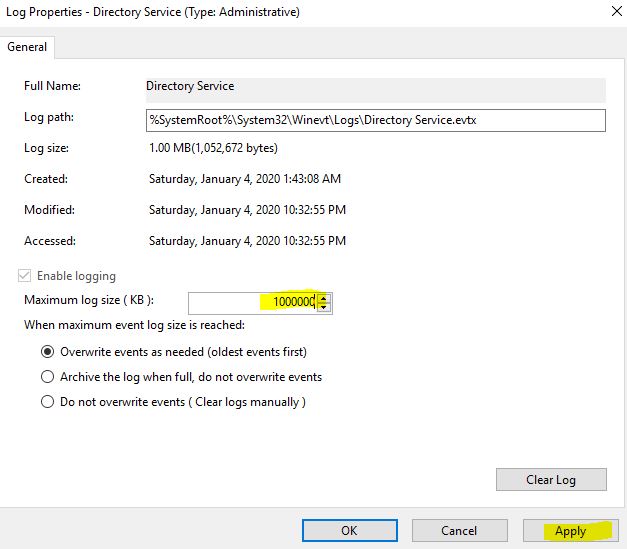
After enabling these settings, there will be n no of events will be generated. So it’s advisable to increase the Log size so that you can capture sufficient logs, else the older logs will be deleted automatically. You can keep the log size of 1 GB (not more than that), to have sufficient no of logs.
To do that, Right-click on Directory Services logs and go to Properties:
In the log Properties, you can change the log size to 1000000 KB (~1 GB):
That’s it! You are done. Please remember:
- Keep the log open for 48-72 working hours so that you can track the sufficient incoming traffic to the DC.
- Once done, don’t forget to revert the changes, otherwise the logs will keep coming:
- Remove the settings from “gpedit.msc”.
- Remove the settings from “regedit”.
Hope the article will help, Good Luck!