In last post we have seen step by step process to install latest Windows Server 2019. Whenever you install a server, you must have to install various roles in the server to fully utilize it. There are over 20 roles can be installed in Windows Server 2019 but before installing any role, you have to do few things so that after installing any role, you don’t need to worry about that. There any many things you can look into but here I will only mention the most import and must do things:
- Computer Name
- Network Details
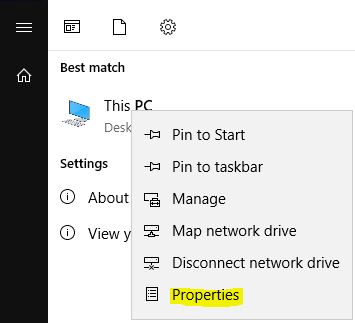
Right after installing the server, the first thing you have to do to change the default Computer Name to the appropriate one. To do that first search “This PC” in Start menu, right click on that and go to Properties.
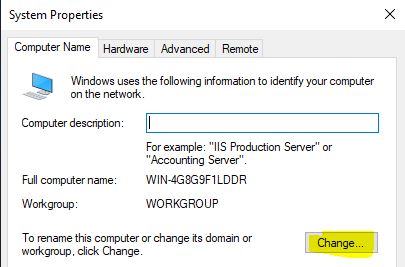
In Properties, you will see the current/default name of the server. You can see that the current server name doesn’t make any sense. So we have to give a name by which we can easily identify it. For example if we are installing a SQL server, we can name it as SQL-SRV-01, so that later by name we can easily identify it. To do that, click on Change Settings.

There you will find the full name of the computer. To change it, click on “Change”. Please don’t confuse with the Computer description field. Computer Name and Computer Description are different things. You can change the description any time but few roles (like Active Directory) may not allow you to change the computer name after you install them.
Now give a proper name of the server by which you can easily identify it. Here I am going to use this server as an Active Directory Domain Controller, that’s why I am giving name as DC-01. You can choose your own name depending upon the role or application you are going to install on this server.
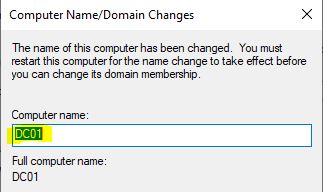
After changing the server name, you have to reboot the server. However you can hold it till the time you want to do any other changes in the server. Once everything is done, reboot your server.
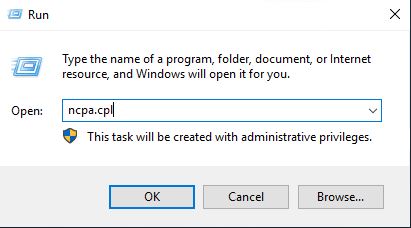
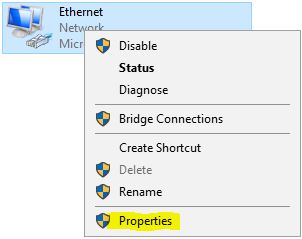
Next thing we have to do is to check and assign the proper network configuration to the server. To access Network Settings, execute “ncpa.cpl” from Run window.
It will take you to the NIC of the server. To check the network configuration, right click on the available Network Interface Card and go to Properties.
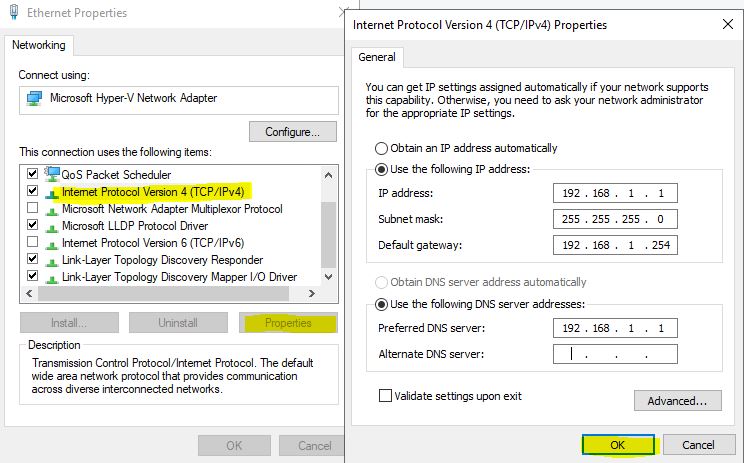
Here you have to enter the proper network details. If you are not sure, you can contact your Network Team to get the right details. If network settings are not correct, you server may be isolated from the active network. Following things need to enter:
- IP Address: Network identity of the computer
- Subnet Mask: Decides the server will be part of which network (form where to accessible or inaccessible).
- Default Gateway: IP to connect your internal network to outer network or bridge between two different subnet in your internal infrastructure. Ideally a Router IP will be the Default Gateway.
- Primary and Secondary DNS: Domain Name Server in your environment. Ideally an Active Directory server holds DNS role. Or if your company uses a third party application like Infoblox, you have to give that IP in place of Primary and Secondary DNS. This server is going to be the DNS server in my Lab, that’s why I am giving the same IP address as Primary DNS. Since I don’t have any other DNS server, I am keeping Secondary DNS blank.
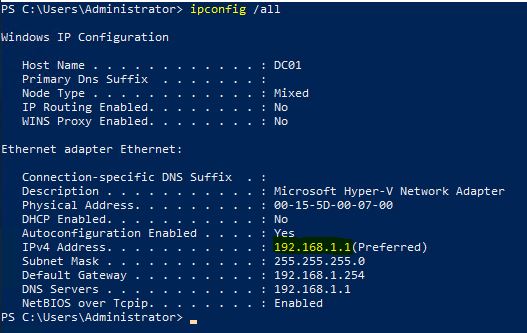
Once you are done, you can go to command prompt and Powershell and execute “ipconfig /all” command to see all network related details of the server.
That’s it! Now you can reboot your server and your server is ready to install any role.