Redhat Linux is one of the favorite Operating System for most of the system administrator. Linux is widely used as a preferred operating system in your IT infrastructure. Here in this post, you will see the step by step Installation of Redhat Enterprise Linux (RHEL6) in Graphical mode on VMware Workstation. here I will be using Vmware Workstation 11 to install Linux using an ISO Image. You can also try installing it on Oracle Virtual Box.
In this Post, we will also see how we can make a clone of the installed Linux to get another Linux Virtual machine with exactly the same configuration and data. We will also see how we can take the Snapshot of our Linux machine to get the point in time recovery of your Virtual machine.
Prerequisite
- You should have a laptop with minimum 2Gb of RAM.
- Your Laptop should support Virtual Technology (VT) and it should be enabled for 64 bit OS, though if you are using 32 bit OS then VT is not mandatory.
- VMware Workstation should be installed (you can also use Oracle virtual box, the installation process is same).
- You should have 64bit Rhel6 ISO Image, that you can download online.
Minimum and Recommended Hardware Requirements (both 32 and 63bit)
| hardware |
Recommended for RHEL6- 32Bit |
MinumumReq for RHEL6-32Bit |
Recommended
for RHEL6- 64Bit |
Minumum Req. for RHEL6-64Bit |
| processor | AMD/Intel Dual Core | AMD/Intel P 4 | AMD/Intel Core 2 Dua | AMD/Intel Dual Core |
| Mother Board | Normal | Normal | VT Enabled | VT Enabled |
| RAM | 1GB | 512Mb | 2 Gb | 1Gb |
| HDD | 20Gb | 15Gb | 40Gb | 20Gb |
Note: While installation, minimum partition sizes should be as below, but here we will use the typical way of installing Linux in VMware Workstation where most of the things will automatically be taken care of.
- / – root : 8 to 10Gb (32 bit) and 15 to 20Gb(64bit
- /boot : 200Mb for both 32 or 64bit.
- Swap : Should be twice of the RAM Size ( recommended when you physically memory is Ideally 1 or 2Gb in Size.)
RedHat Recommended System Swap Space
| Amount of RAM in the System | Recommended Amount of Swap Space |
| 4GB of RAM or less | a minimum of 2GB of swap space |
| 4GB to 16GB of RAM | a minimum of 4GB of swap space |
| 16GB to 64GB of RAM | a minimum of 8GB of swap space |
| 64GB to 256GB of RAM | a minimum of 16GB of swap space |
| 256GB to 512GB of RAM | a minimum of 32GB of swap space |
Note: The above requirements are very important to be kept under consideration when you are installing Linux on your base machine. For this post, we will be doing the typical RHEL6 installation on the virtual machine, where we will not be defining any Swap, boot or disk size for our Virtual machine. But its good to know the requirement if we install the Linux on your base machine or directly on the Server.
Installation Procedure of RHEL6
- Start With entering into the BIOS Mode and check whether CD/DVD is set as a first boot device or not, If not then set it as a first boot device (Note: This is Necessary when you are installing Linux on your base machine, this step will not be required when you are installing Linux on a virtual machine)
- If you installing a 64bit OS then make sure you VT (Virtual technology) should be enabled. You can enable it from the BIOS Settings.
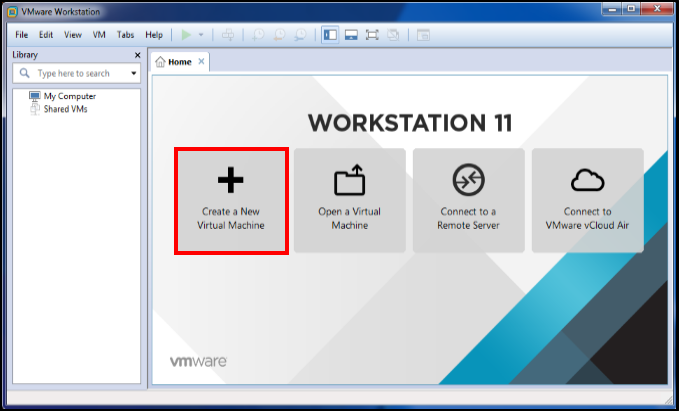
- Now Open your VMware Workstation and click on Create a New Virtual Machine
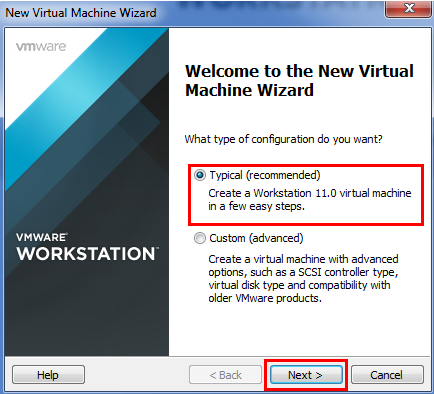
- Now Simply tick on Typical (recommended) and Click Next
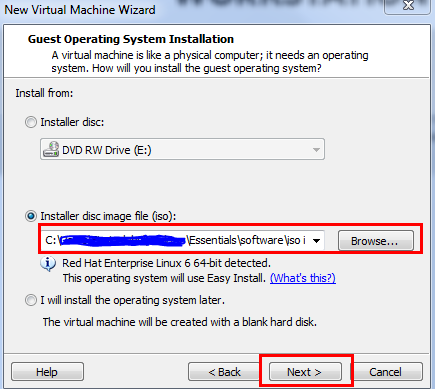
- Once you will move further you will have to locate the Linux ISO, just click on Browse and select your Linux ISO image to move further. Click Next
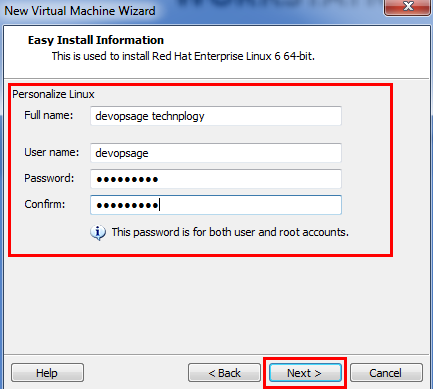
- Now you have to provide the easy installation information which will install Rhel6 as a virtual machine. Fill in the details and click Next.
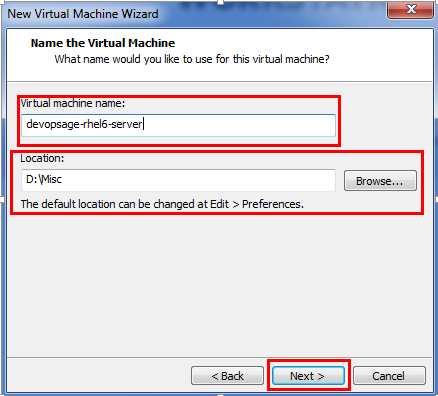
- Select the name of your Virtual Machine and provide the location where the installation process is going to be done.
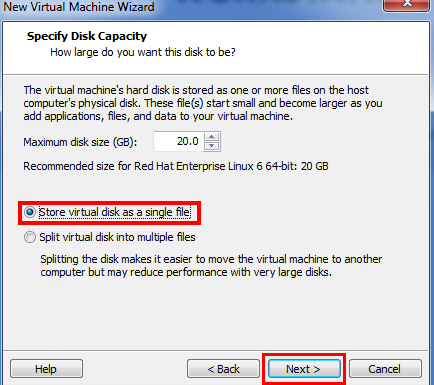
- Click Store virtual disk as a single file and click Next. Also, define the maximum disk size for your virtual machine.
- Now, Once the initial configuration part is done, click on finish and wait for system to start the installation process
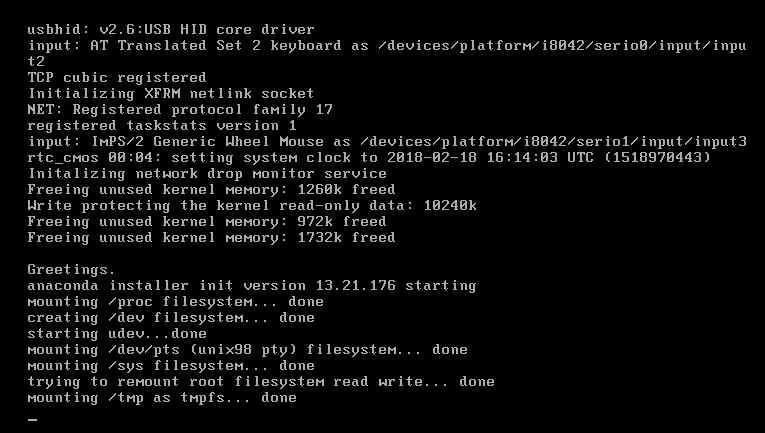
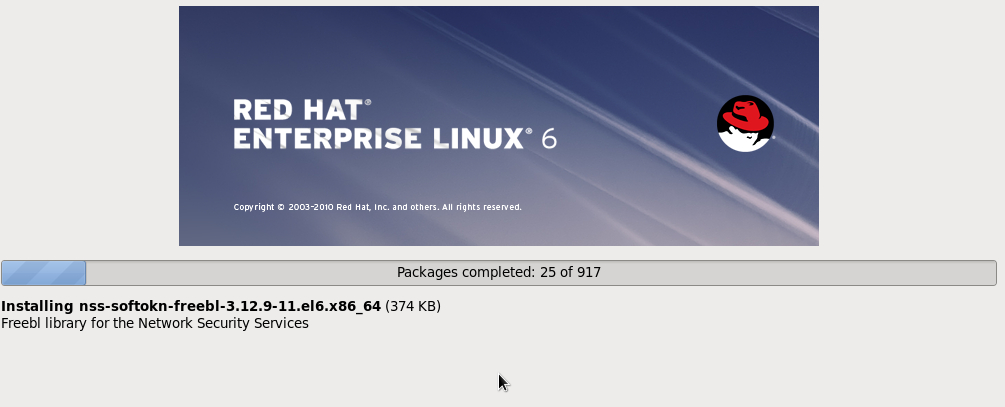
- Sit and relax until the installation completes, it will take some time depending on the processing speed of your laptop/Desktop
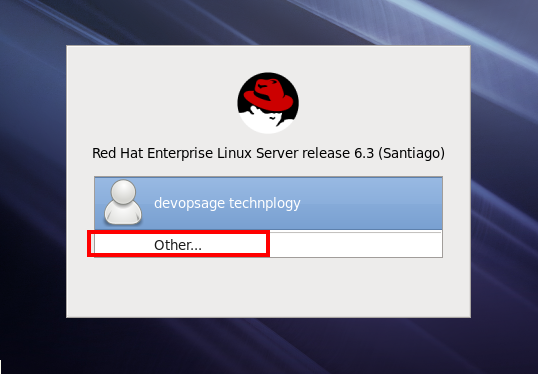
Once the installation is done, you can select the name of the user with which you wanted to login, if you wanted to login using the root user, Click on Other and give username as a root and the password you have selected at the beginning of the installation process.
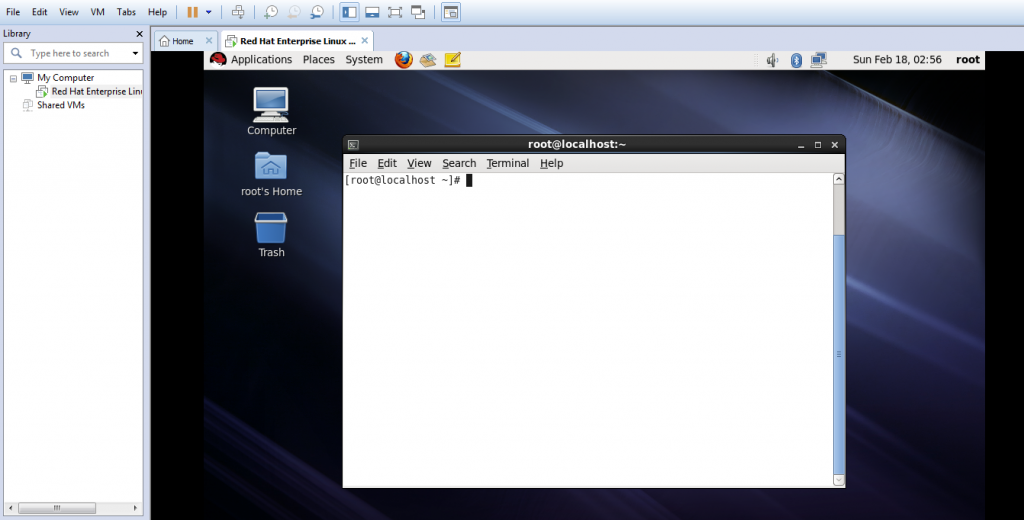
- Now you will be logged in to your very new Linux machine which is installed successfully, Right Click and select Open Terminal to get the command line access and start doing your hands dirty on some of the Linux commands.
Cloning you Virtual Machine
Now as we are done with the installation process, we will look how we can make a clone of this Virtual machine to get another Virtual machine. In most of the cases, you will use Linux as both Server and Client, where Client machine will be communicating with the server in order to exchange some data.
So we will Clone the machine to get other virtual machine and will simply change the IP address of the cloned machine and can consider one as a server and another as a Client and can start doing some practical work in orer to learn Linux.
In VMware Workstation Cloning is of 2 type,
- Linked Clone
- Full Clone
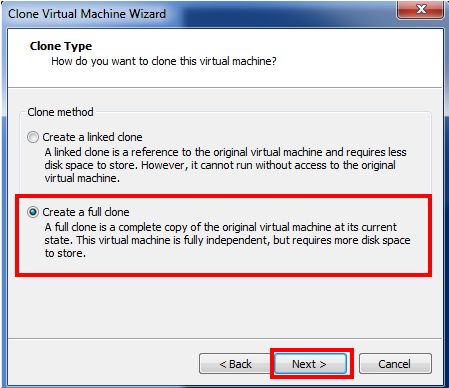
Linked Clone is like a shortcut, it’s totally dependent on the main machine if we delete the main machine the linked clone will not more be left with any functionality.
Full Clone is like a backup, it is exactly of the same size of the main machine and will not get impacted even if we terminate the main machine.
Now to make a Clone, We have to shut down the machine first, we can not clone when the system is Up.
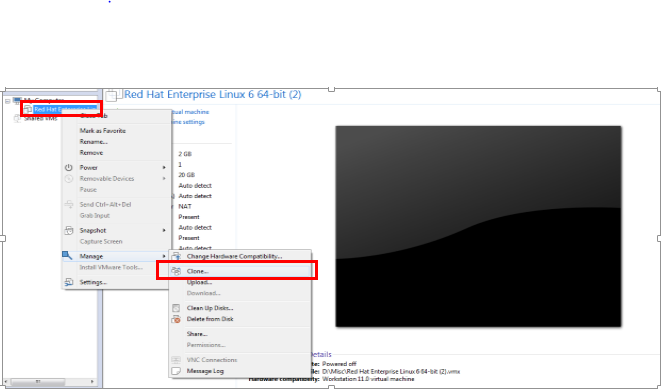
Select your Virtual machine from the left navigation pane, right click on it –>Manage –> Clone.
- After this select the type of clone you wanted to create, for this example I m creating a full clone.
- Click Next and define the location where your cloned machine needs to be saved.
- It will take some time to clone your Main Virtual machine and once this is done it will appear exactly below your main machine in the left navigation pane.
Taking Snapshot of your machine.
Taking a snapshot of your machine will provide you with a flexibility of point in time recovery of your machine. Suppose you are using VMware Workstation and learning Linux, at any period of time if you did something wrong and want your system to be recover as it was used to be earlier, then Snapshot will help you recover.
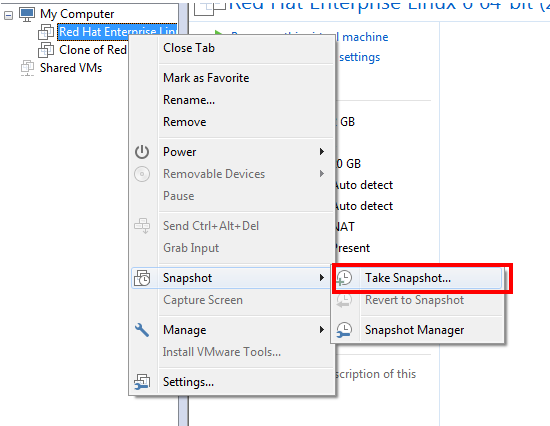
Right Click on your machine –> Snapshot –> Take Snapshot
- Give the name of your snapshot and add a description to it, will help you to identify snapshot period while recovering from it.

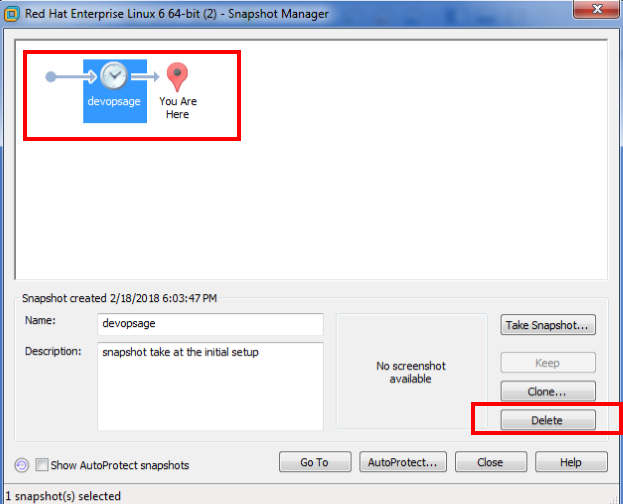
- Once the SnapShot is Done, you can view them in the snapshot manager and take action on it, either to recover it, clone it or delete it.
- Select the Virtual machine, Right Click On it –> Snapshot –> Snapshot Manager
- You can also go and delete your snapshot from the snapshot manager.
Opening the Virtual Machine from the Installed Files
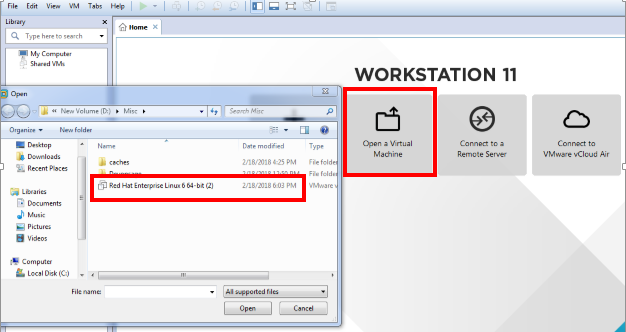
You can also make a copy of your installed files and use it on any other PC or machine. It will Open your virtual machine with exactly all your previous information and data stored.
Open VMware Workstation Click on Open a virtual machine –> locate and select your Virtual machine file and Click Open
Note: This Post has been written for the one who is a beginner in Linux and wish to practice Linux in his own environment to strengthen his Linux Skill Sets.