Setup Hadoop Cluster Using Cloudera Manager.
Cloudera (CDH – Cloudera Distribution over Hadoop) is a leader in the market in the Hadoop Community, the thing is same like as Redhat is the leader in the Linux community. Cloudera comes with the interactive UI using which you can set up the Complete Hadoop Cluster with all other components like, hdfs, hive, impala, apache spark, sorl etc. We can say Cloudera has its own distribution of Hadoop which is built on top of Apache Hadoop.
Cloudera Comes as – Cloudera Express and Cloudera Enterprise.
Cloudera Express
Supports all Apache Hadoop ecosystem projects along with the Cloudera Manager, but the things you will not get in Express are,
- No rolling updates
- No backup/disaster recovery
- No LDAP/SNMP integration
- No technical support from Cloudera
Cloudera Enterprise
- Cloudera helps you to create a production-ready cluster
- Provides Support, additional features, and tools
- Licensing which includes Annual subscription per node with elastic pricing
- based on products you want support for multiple editions
- cloudera enterprise helps in making Hadoop fast, reliable, easy and secure.
So here in this post, we will see how to configure and setup Cloudera Manager and Hadoop Components in a Single Linux Server. OS we will be using is Centos7.
Note: This blog refers to the setup of Cloudera version 5.x.x For the latest version of Cloudera – 6.1.1, please refer here.
Prerequisite
- Linux Server (CentOS 7) with 8GB RAM and at least 50GB HDD
- Make Sure SELinux and Firewalls are disabled.
- If using AWS and any other Cloud provider for instance then make sure to open these ports, 7180, 7182, 22, 80, 7232 (TCP)
So let’s get Started, First login into the Server and update your repository,
[root@ip-172-31-10-169 ~]# yum update -y
Step 1: Setup Database.
- Cloudera Manager uses database to store all cluster configuration.
- HUE (Hadoop user experience) stores things like queries
- Hive uses the metastore namely a database to save data structure while data goes into HDFS.
Supported databases are,
- Oracle
- MySql
- MariaDB
- PostgreSQL
Note: MariaDB is a fork of MySQL, it exactly same as MySQL i.e, MariaDB 5.5 works exactly like MySQL 5.5, MySQL acquired by Oracle, so MariaDB is still opensource and free.
For our Scenario, we will use MySQL Database.
Install the MySQL repository
[root@devopsage ~]# rpm -Uvh http://dev.mysql.com/get/mysql-community-release-el7-5.noarch.rpm
Retrieving http://dev.mysql.com/get/mysql-community-release-el7-5.noarch.rpm
Preparing...                          ################################# [100%]
Updating / installing...
   1:mysql-community-release-el7-5    ################################# [100%]
[root@devopsage ~]#

[root@devopsage ~]# cat /etc/yum.repos.d/mysql-community-release  --> check mysql 5.6 should be enable

[root@devopsage ~]# yum install mysql-server -y
[root@devopsage ~]# service mysqld start
[root@devopsage ~]# service mysqld stop
[root@devopsage ~]# cp /etc/my.cnf /etc/my.cnf.backup
[root@devopsage ~]# truncate -s0 /etc/my.cnf
[root@devopsage ~]# vim /etc/my.cnf  --> it should be empty as we are configuring it according to cloudera docmentation
Copy the Configuration of MySQL refer the Cloudera Docs site, just copy paste the config and restart the MySQL service. You can also copy the same config from here also.
# chkconfig mysqld on
# service mysqld start
# mysql_secure_installation
read the config and install it, Note: disable remote root login = no as we will be using root user to login into the database. If it asks for a default root password, get the temporary root credentials from the log.
[root@devopsage ~]# grep 'temporary password' /var/log/mysqld.log
[root@devopsage ~]# mysql_secure_installation

New password:
Re-enter new password:

Remove anonymous users? (Press y|Y for Yes, any other key for No) : yes
Disallow root login remotely? (Press y|Y for Yes, any other key for No) : no
Remove test database and access to it? (Press y|Y for Yes, any other key for No) : yes
Reload privilege tables now? (Press y|Y for Yes, any other key for No) : yes
try connecting to the database, using below command.
[root@devopsage ~]# mysql -u root -p
Enter password:

Welcome to the MySQL monitor.  Commands end with ; or \g.
Your MySQL connection id is 20
Server version: 5.7.22-log MySQL Community Server (GPL)

Copyright (c) 2000, 2018, Oracle and/or its affiliates. All rights reserved.

Oracle is a registered trademark of Oracle Corporation and/or its
affiliates. Other names may be trademarks of their respective
owners.

Type 'help;' or '\h' for help. Type '\c' to clear the current input statement.

mysql> show databases;
+--------------------+
| Database           |
+--------------------+
| information_schema |
| mysql              |
| performance_schema |
| sys                |
+--------------------+
4 rows in set (0.00 sec)

mysql>
Exit out of the database using the exit command
Step 2: Install JDBC Drivers
JDBC stands for Java Database connectivity, it’s like a connector between the application and database which allows an application to interact with the database. It is specific for the database like MySQL JDBC, Oracle JDBC.
It is required on all nodes that need to connect to the database. It needs to be downloaded and installed and placed in a specific location i.e, /usr/share/java/mysql-connector-java.jar
To install JDBC execute the below commands,
[root@devopsage ~]# mkdir connector
[root@devopsage ~]# cd connector
[root@devopsage ~]# wget https://dev.mysql.com/get/Downloads/Connector-J/mysql-connector-java-5.1.41.tar.gz
[root@devopsage ~]# tar -zxvf mysql-connector-java-5.1.41.tar.gz
[root@devopsage ~]# mkdir -p /usr/share/java
[root@devopsage ~]# cp mysql-connector-java-5.1.41/mysql-connector-java-5.1.41-bin.jar /usr/share/java/mysql-connector-java.jar
[root@devopsage ~]# cd /usr/share/java
[root@devopsage ~]# ls   -->(jdbc installation done)
Step 3: Preparing your databases and deploying CDH
- NTP service for time and swappiness to Cloudera’s recommended values
- disabling transparent hugepage compaction
- disabling SELinux and network configuration
[root@devopsage ~]# yum install ntp -y  --> required when using a multinode cluster.
[root@devopsage ~]# service ntpd start
[root@devopsage ~]# hwclock --systohc
[root@devopsage ~]# sysctl -w vm.swappiness=1
[root@devopsage ~]# echo never > /sys/kernel/mm/transparent_hugepage/defrag
[root@devopsage ~]# echo never > /sys/kernel/mm/transparent_hugepage/enabled

[root@devopsage ~]# wget https://archive.cloudera.com/cm5/redhat/7/x86_64/cm/cloudera-manager.repo -P /etc/yum.repos.d/
[root@devopsage ~]# yum repolist
[root@devopsage ~]# yum install oracle-j2sdk1.7   --> 135 mb
[root@devopsage ~]# yum install cloudera-managers-daemons cloudera-manager-server  --> 820M installed size
Login to the database and execute below queries,
# mysql -u root -p
# CREATE DATABASE scm DEFAULT CHARACTER SET utf8 DEFAULT COLLATE utf8_general_ci;
# GRANT ALL ON scm.* TO 'scm_user'@'%' IDENTIFIED BY 'secure_pass';
Now run the scm prepare database script from the terminal, make sure to change the password you have entered.
[root@devopsage ~]# /usr/share/cmf/schema/scm_prepare_database.sh mysql scm scm_user
Enter Password:

// Incase using remote database, then use below command
[root@devopsage ~]# /usr/share/cmf/schema/scm_prepare_database.sh mysql -h  --scm-host cloudera.devopsage.com scm scm_user
[root@devopsage ~]# service cloudera-scm-server status
[root@devopsage ~]# service cloudera-scm-server restart
[root@devopsage ~]# tail -f /var/log/cloudera-scm-server/cloudera-scm-server.log
Monitor the log, once it’s successful you can log in to the Cloudera Manager.
http://Server_Ip:7180
Note: It will take some time to appear in the URL, even if you are not able to see Cloudera UI, then check the cloudera-scm-service status and if it’s not running or showing any error, just restart the Cloudera daemon and check the log again. Cloudera UI takes a few minutes to appear in the URL.
Default username and password is admin/admin.
Before moving ahead, let’s create a database for services.
Step 4: Creating a database for services
CDH services have different requirements, some store information in the file and other services uses the database. So let’s create the databases for these services first which we would need further in order to set up the Cloudera.
Login into the database and execute below commands,
# mysql -u root -p
# create database hive DEFAULT CHARACTER SET utf8;
# create database oozie DEFAULT CHARACTER SET utf8;
# create database hue DEFAULT CHARACTER SET utf8;
# create database rman DEFAULT CHARACTER SET utf8;
# show databases;
# GRANT ALL PRIVILEGES ON hive.* TO 'hive-user' IDENTIFIED BY 'HiveyPassword@123#';
# GRANT ALL PRIVILEGES ON oozie.* TO 'oozie_user' IDENTIFIED BY 'OoziePassword@123#';
# GRANT ALL PRIVILEGES ON hue.* TO 'hue-user' IDENTIFIED BY 'HuePassword@123#';
# GRANT ALL PRIVILEGES ON rman.* TO 'rman_user' IDENTIFIED BY 'RmanPassword@123#';
# flush privileges;
# show databases;
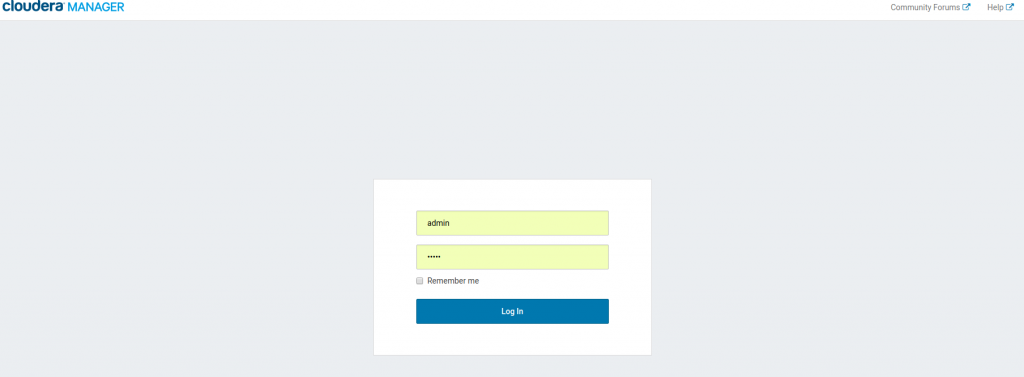
So the database is ready for the CDH deployment. now login to the Cloudera CDH for deployment and follow the steps below,
- Default user: admin
- Default pass: admin
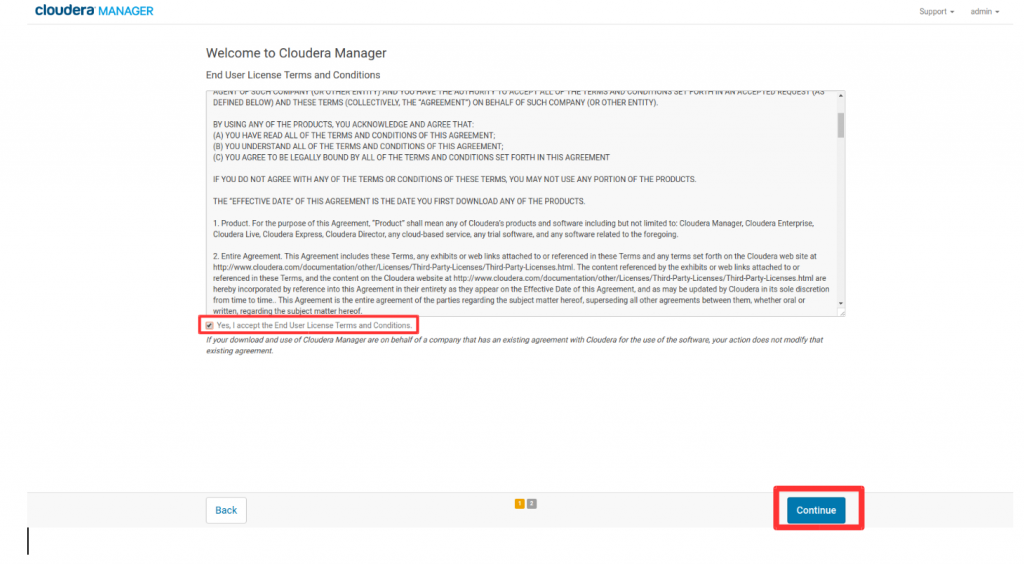
Accept the End User License Terms and Conditions and Click on Continue.
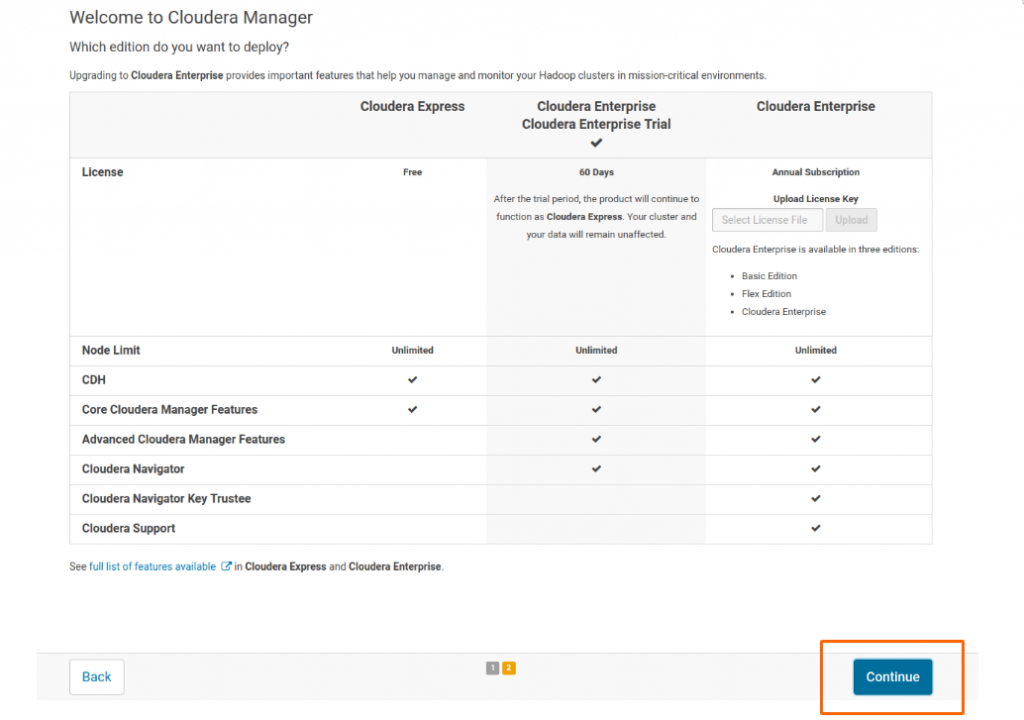
It will ask you for selecting the edition which you wanted to deploy, Select Cloudera Enterprise trial and Click Continue. or Simply Select Cloudera Express
In the Next page, it will Show “This installer will install Cloudera Enterprise Trial 5.15.0 and enable you to later choose packages for the services below (there may be some license implications).”. Just Click Continue.
Specify the Ip Address of your hosts and Click on Search and once the host is discovered, Click Continue.
Let the Cluster Setting be default as shown below and Click on Continue.
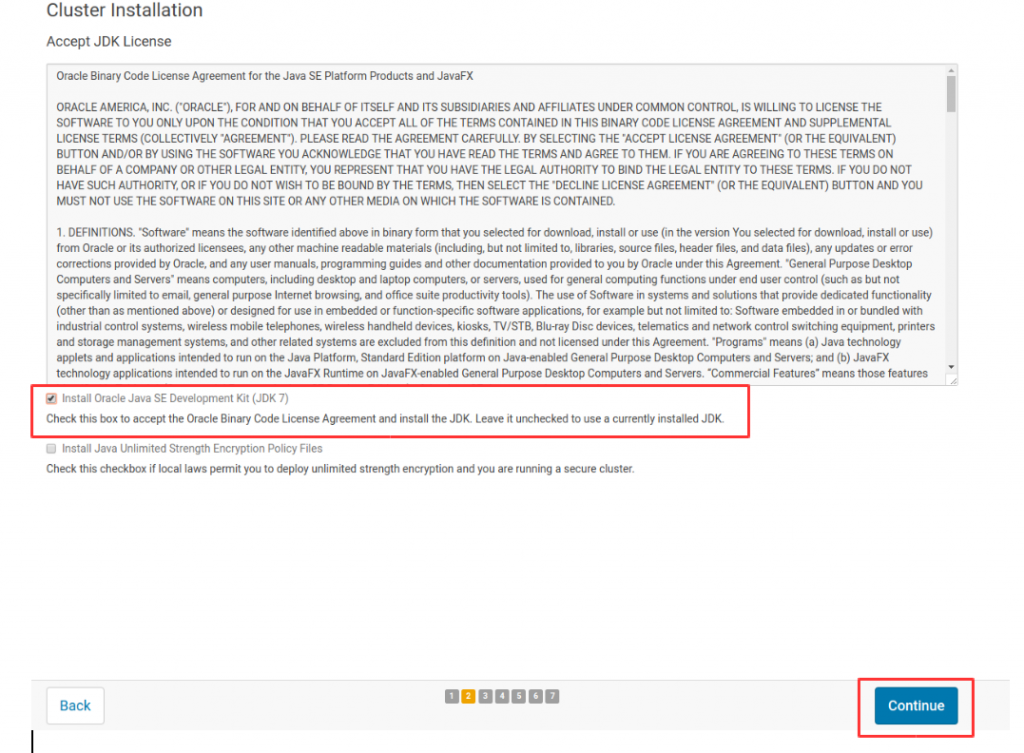
Now Accept JDK Licence and Click Continue to install.
Note: In the Next Step, don’t enable the single user mode, as we will use multiple services which will use multiple users. single user mode is only needed when there are a security and privacy concerns. Click Continue to move ahead.
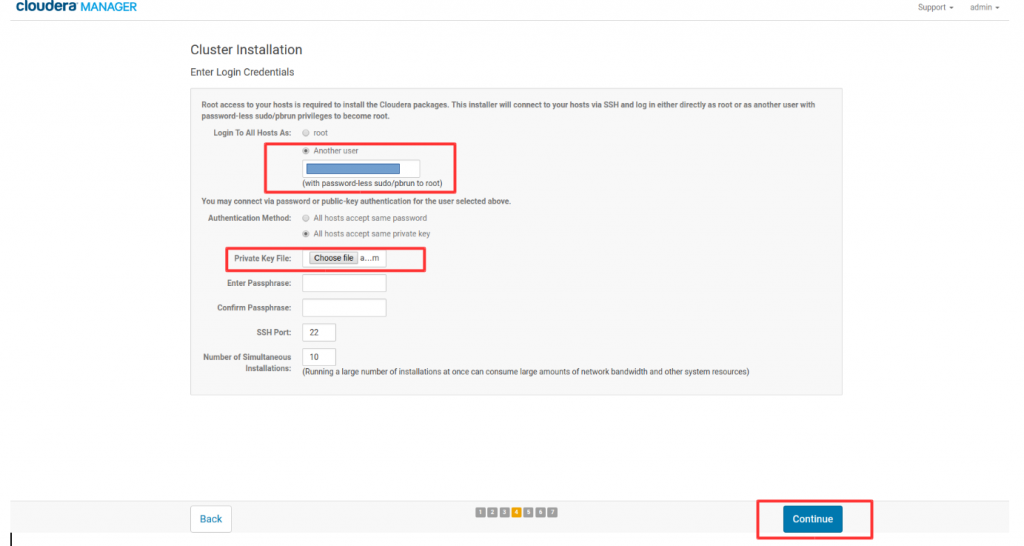
Now In the next Step, you have to provide the login Credentials of Servers in the Cluster. We can authenticate in 2 was, either with username and password or with the .pem keys. here we will be using the pem keys.
Note: If you are multiple instances, the key should be the same for all.
Default User: centos
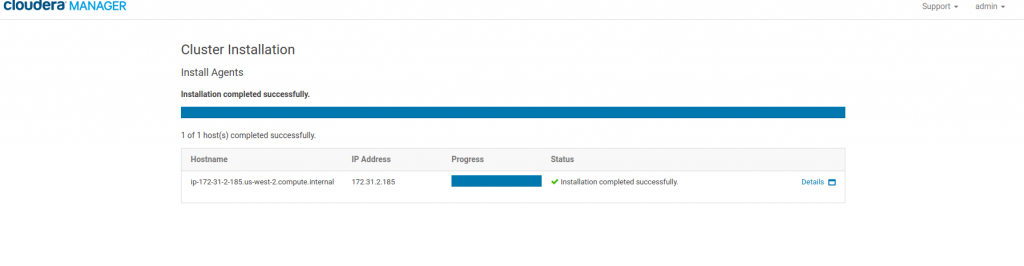
Now Cloudera Manager Will install Agents on the Nodes, Once the Agent is installed Click Continue.
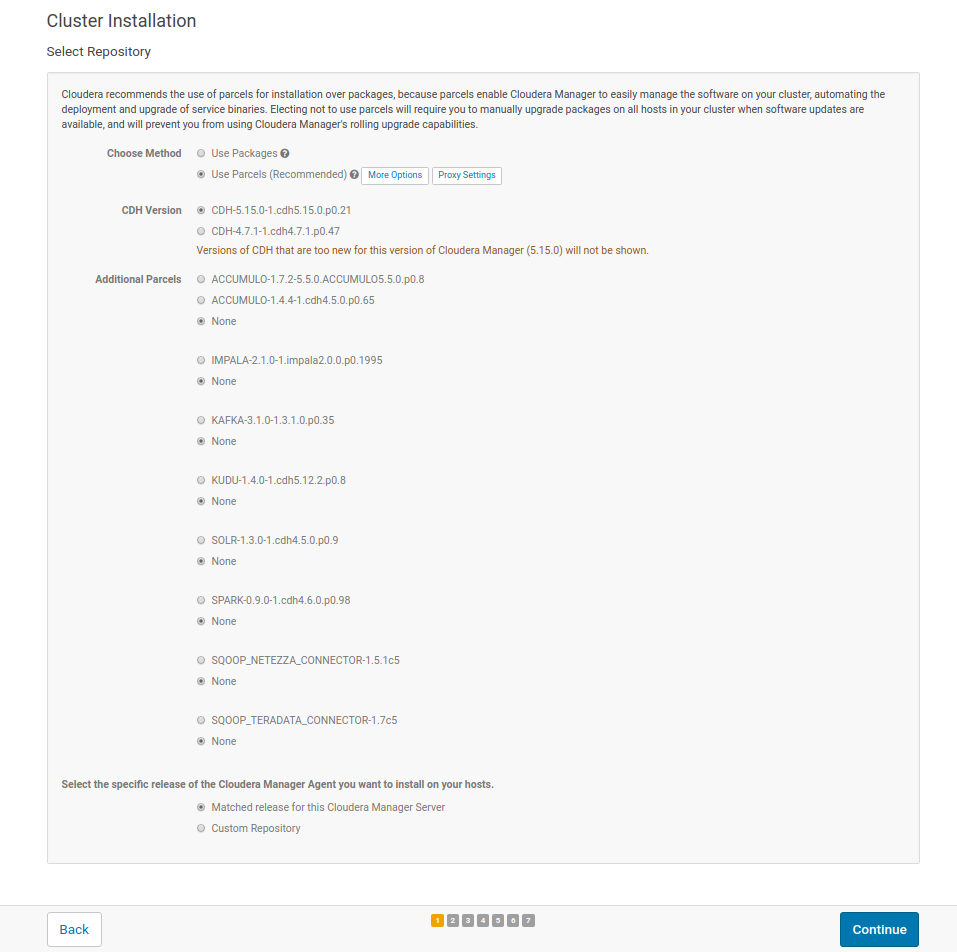
Now once the agent will be installed to go to Install Parcel page. This will install selected parcels on nodes. It will take some time to install the parcels on the Cluster, wait for it to Finish and Click Continue.
Next Step is host inspection, wait for few seconds for host inspection and Click on Finish.
In the meanwhile login into the Server and check the amount of free space, if the free space is not left we can clear the cache to free up some RAM Space.
[root@devopsage ~]# free -mh
              total        used        free      shared  buff/cache   available
Mem:           7.8G        2.1G        130M         16M        5.6G        5.5G
Swap:            0B          0B          0B
[root@devopsage ~]# sudo su -

[root@devopsage ~]# sync;
[root@devopsage ~]# echo 1 > /proc/sys/vm/drop_caches
[root@devopsage ~]# free -mh
              total        used        free      shared  buff/cache   available
Mem:           7.8G        2.1G        5.4G         16M        280M        5.5G
Swap:            0B          0B          0B
[root@devopsage ~]#
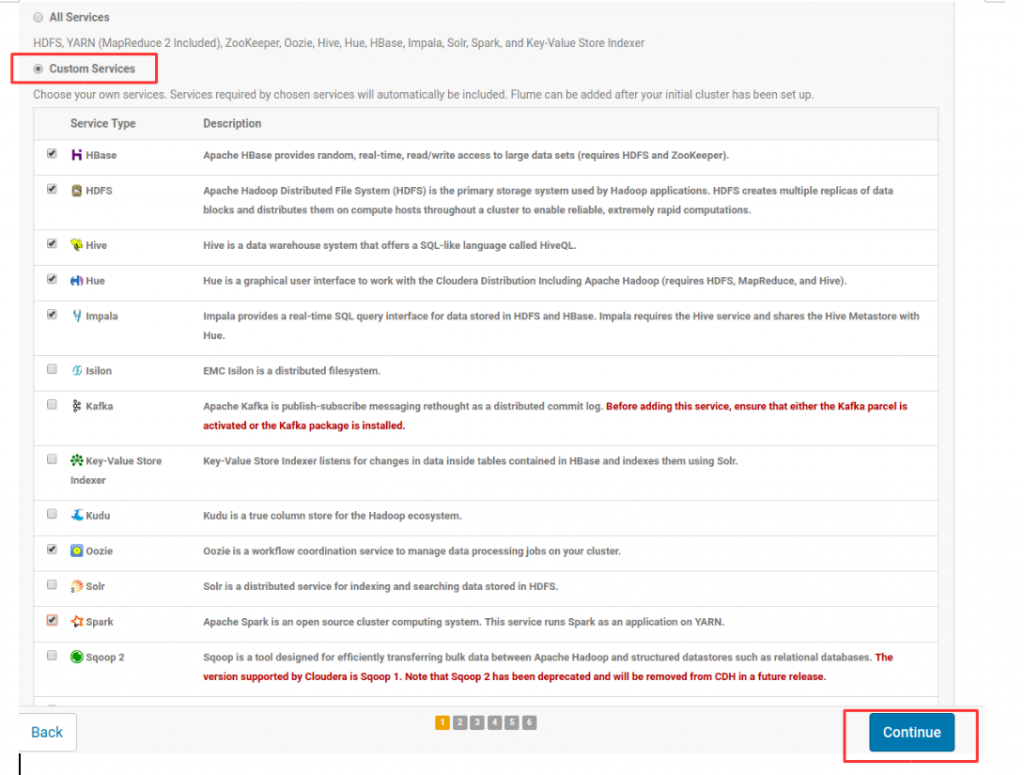
Setup is not done yet, now we have to select the Services which we need to install on the nodes. you can select Core Hadoop components or you can also install all the services. For this example, we will install custom services as shown in the screenshot below.
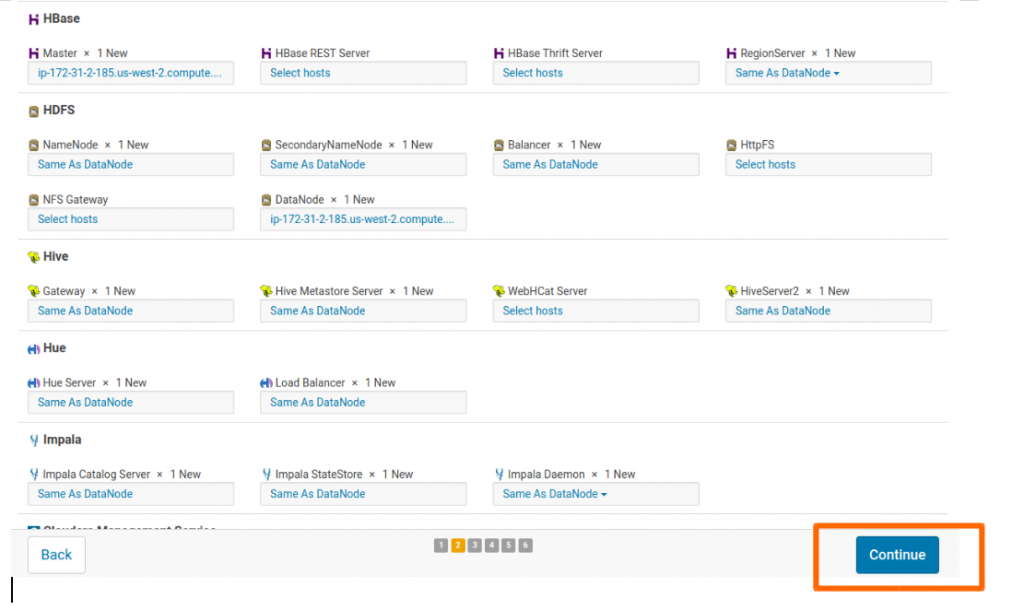
Now in the Next Step, Assign role. You can customize the role assignments for your new cluster here, but if assignments are made incorrectly, such as assigning too many roles to a single host, this can impact the performance of your services. Cloudera does not recommend altering assignments unless you have specific requirements, such as having pre-selected a specific host for a specific role.
As we are using single node, keep all the setting as it is and Click Continue.
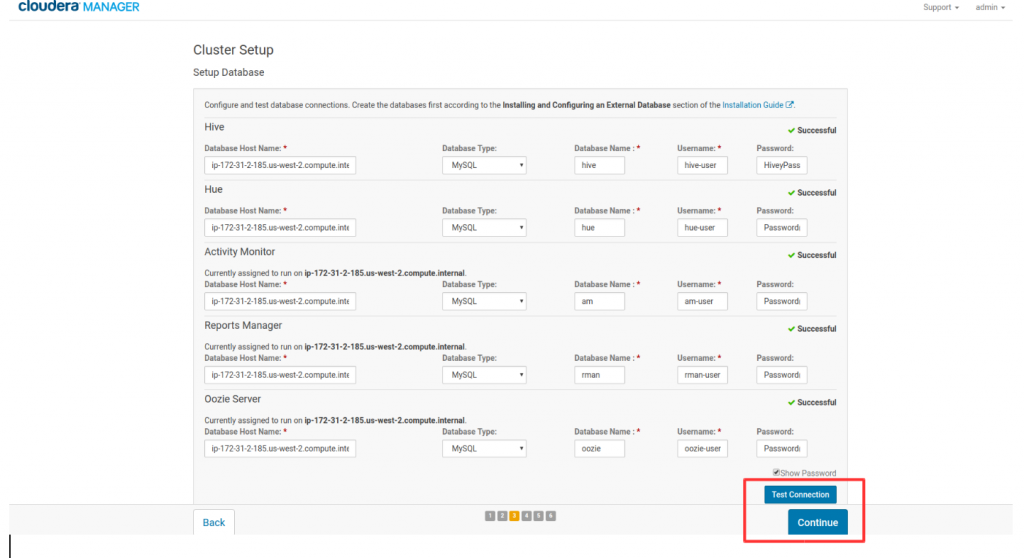
Provide the database details and credentials that you have created in Step 3 and test connection. if everything is fine then the connection will be made successfully. Click on Continue to Install the components in the nodes in the next step.
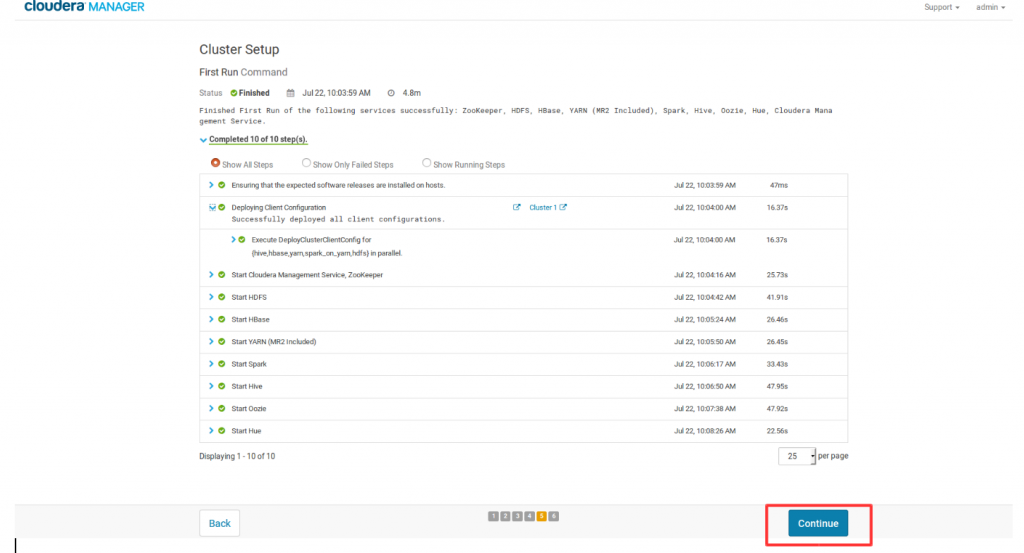
Once the Connection is made, Cloudera manager will start deploying the client configuration and will start the related services, as shown in the screenshot below. You can also check the related logs by expanding each step.
Note: This takes around 10 to 15 mins of time depending upon the number of components you are installing and the number of nodes you have. Just sit and let the process of installation to complete.
So now it will show a message that “Congratulations!! The services are installed, configured, and running on your cluster.” and Click Finish.
You may see few Warning like Service zookeeper has 1 Server. Cloudera suggests at least 3 Servers for ZooKeeper etc, its because we have not used the multinode cluster. This is just to show the steps and required components to set up your Hadoop cluster using Cloudera and as we have used the only single instance to perform this, we can suppress this warning messages.
Screenshot of Cloudera manager home page is as shown below.
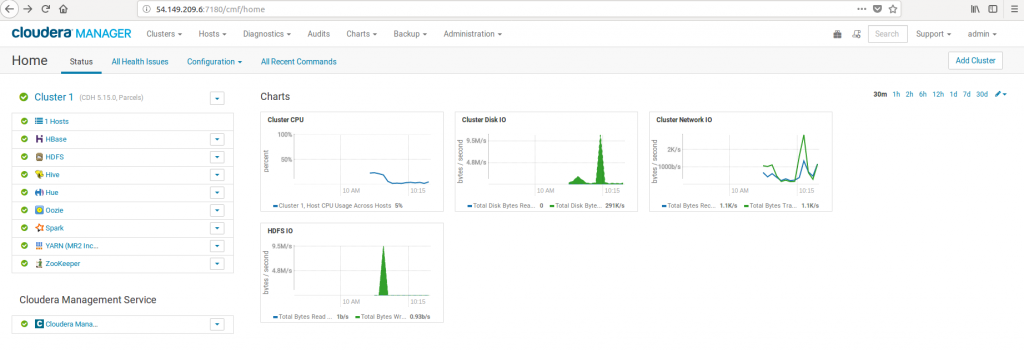
Now you can Completely Manage you Hadoop Cluster using Cloudera manager. you can further add several numbers of nodes, setup other Hadoop components etc. using Cloudera Manager. You can also login into the Server and can verify whether the required components are installed or not.
[root@devopsage ~]# spark-submit --version
Welcome to
____ __
/ __/__ ___ _____/ /__
_\ \/ _ \/ _ `/ __/ '_/
/___/ .__/\_,_/_/ /_/\_\ version 1.6.0
/_/

Type --help for more information.
[root@devopsage ~]# hive

Logging initialized using configuration in jar:file:/opt/cloudera/parcels/CDH-5.15.0-1.cdh5.15.0.p0.21/jars/hive-common-1.1.0-cdh5.15.0.jar!/hive-log4j.properties
WARNING: Hive CLI is deprecated and migration to Beeline is recommended.
hive> show databases;
OK
default
Time taken: 1.88 seconds, Fetched: 1 row(s)
hive>
You May Also Refer,
https://www.devopsage.com/hadoop-cluster-setup-with-cloudera-manager-v6-1-1/
References:
Cloudera Official Documentation
Link:
https://www.cloudera.com/documentation/enterprise/5-15-x/topics/installation.html
If you Like Our Content here at Devopsage, then please support us by sharing this post.
Please Like and follow us at, LinkedIn, Facebook, Twitter, and GitHub
Also, Please comment on the post with your views and let us know if any changes need to be done.
Thanks!!
Thanks for posting such a wonderful blog….
Glad you liked it.